
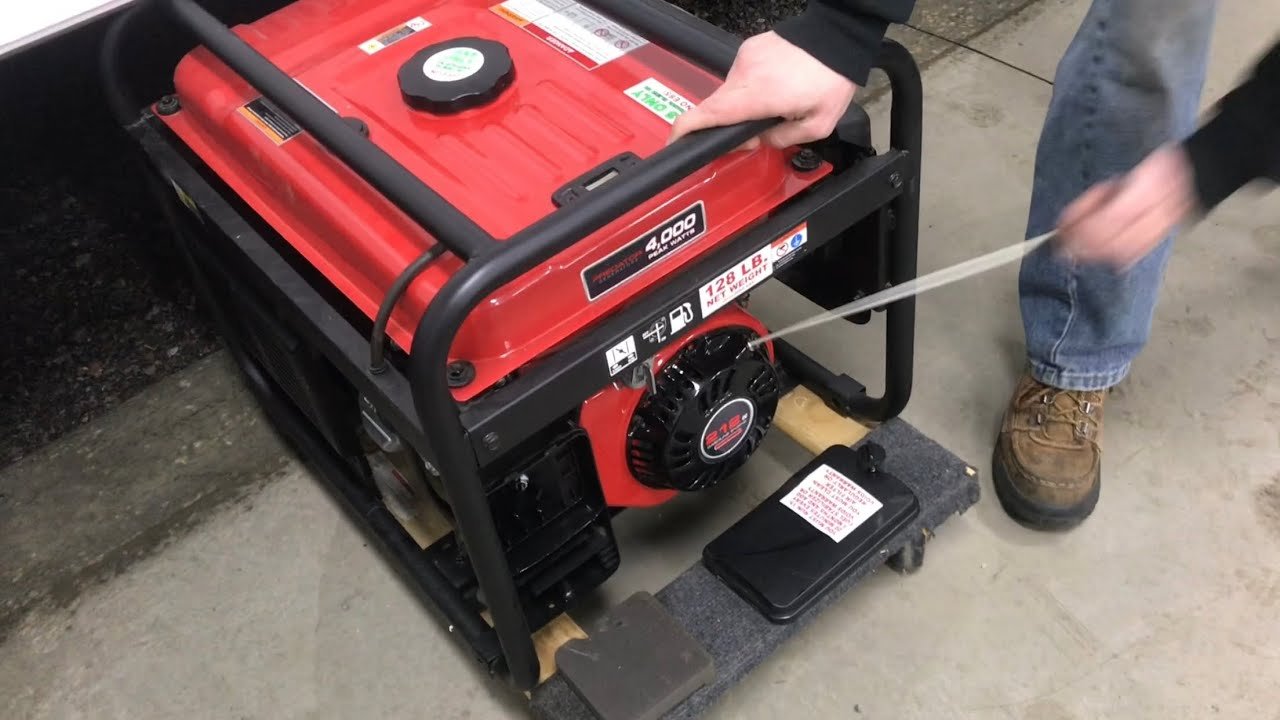
Have you ever found yourself in a frustrating situation where your generator won’t start after sitting idle for a while? You’re not alone.
Many people face this issue, and it can be a real headache, especially when you need power the most. Whether it’s for an outdoor event, a home backup, or a job site, a non-starting generator can throw a wrench in your plans.
We will explore the common reasons why your generator might refuse to start after being unused for some time. You’ll learn practical tips to diagnose the problem and get your generator running smoothly again. Don’t let this setback ruin your day; keep reading to discover how you can take charge and ensure your generator is ready when you need it!
Common Causes Of Generator Starting Issues
Generators can be tricky. After sitting for a while, they often refuse to start. Understanding the common causes can help you troubleshoot. Here are some typical reasons your generator might not start.
Fuel Problems
Old fuel is a common issue. Gasoline can go stale after a few months. This stale fuel can clog the carburetor. Always use fresh fuel for better performance.
Battery Issues
The battery may be dead or weak. Cold temperatures can drain it quickly. Check the battery connections for corrosion. Clean any dirt and ensure a solid connection.
Oil Level
Low oil levels can prevent starting. Generators need proper oil to function. Check the oil level regularly. Add oil as needed to keep your generator running.
Dirty Air Filter
A dirty air filter can restrict airflow. This makes it hard for the engine to start. Clean or replace the filter often. This simple step can enhance performance.
Electrical Issues
Loose wires or bad connections can cause problems. Inspect the wiring for damage. Ensure all connections are tight and secure. This can solve many starting issues.
Inspecting The Fuel System
A fuel system inspection is key when a generator won’t start after sitting idle. Old fuel can cause clogs and blockages. Check for leaks, clean the fuel filter, and ensure the fuel lines are clear to restore proper function.
Inspecting the fuel system is crucial when your generator won’t start after sitting idle for a while. Fuel issues are often the root cause of startup problems. Let’s break down how to inspect your fuel system effectively.Checking Fuel Levels
Start by checking the fuel levels in your generator. You might be surprised at how often the simplest oversight can lead to frustration. Make sure there’s enough fuel in the tank. If the level is low, fill it up with fresh fuel. Don’t forget to inspect the fuel gauge. It might be malfunctioning and giving you false readings.Draining Old Fuel
Old fuel can be a major issue. If your generator has been sitting for months, it’s likely that the fuel has degraded. Draining old fuel is a straightforward task. Use a siphon or the fuel drain valve if your generator has one. Dispose of the old fuel properly—never pour it down the drain or throw it in the trash. Consider this: how often do you check the fuel in your generator? Regular maintenance can save you headaches down the road.Cleaning The Carburetor
A clogged carburetor can prevent your generator from starting. If you suspect fuel issues, cleaning the carburetor should be on your to-do list. Start by removing the carburetor from the engine. Pay attention to any dirt or debris inside. Use a carburetor cleaner to spray all parts thoroughly. Make sure to clean the jets and passages to ensure a smooth flow of fuel. Have you ever cleaned a carburetor? It can be a rewarding task that often leads to a working generator. Taking these steps to inspect the fuel system can make a significant difference in your generator’s performance. You’ll feel more confident in your ability to troubleshoot and maintain your equipment.Battery And Electrical Connections
When your generator won’t start after sitting idle, one of the first areas to check is the battery and electrical connections. These components play a crucial role in ensuring your generator functions properly. Neglecting them can lead to frustrating situations, especially when you need power the most.
Testing The Battery
Start by checking the battery voltage. A fully charged battery should read around 12.6 volts or more. If it’s below 12.4 volts, it’s time to recharge or replace it.
Use a multimeter for accurate readings. If your battery is old or has been sitting for a long time, it might not hold a charge effectively. Don’t wait until you need the generator to discover this issue!
Tightening Loose Connections
Next, inspect all electrical connections. Loose or corroded connections can prevent your generator from starting. A simple tightening of the battery terminals can often solve the problem.
Make it a habit to check these connections regularly. A small amount of rust or dirt can create a big issue. Ensure that everything is secure and clean.
Replacing Corroded Terminals
If you notice corrosion on the battery terminals, it’s essential to replace them. Corrosion can inhibit the flow of electricity and lead to starting problems. Clean the terminals with a mixture of baking soda and water before replacing them.
Using new terminals can significantly improve the performance of your generator. Make sure to choose the right size and type for your battery. This small step can save you from a big headache later.
Have you ever faced a situation where a simple battery check could have saved you time and frustration? Keeping an eye on these details can make all the difference in ensuring your generator is ready when you need it.

Credit: www.youtube.com
Air Filter Maintenance
Keeping your generator’s air filter clean is crucial. A clogged air filter can block airflow. This can lead to starting issues. Regular maintenance helps your generator run smoothly.
Removing Clogged Filters
Start by locating the air filter. Check the owner’s manual for guidance. Remove any screws or clips holding it in place. Gently pull out the filter. Inspect it for dirt and debris. A clogged filter often looks dark or dusty.
Cleaning Or Replacing Filters
Cleaning the filter can restore airflow. Use compressed air to blow out dust. If the filter is too dirty, replace it. Buy a new filter that fits your generator model. Regularly check and clean filters. This simple step keeps your generator running well.
Spark Plug Troubleshooting
When a generator won’t start, spark plugs often cause the problem. Spark plugs are small parts, but they play a big role. They create the spark needed for the engine to run. Over time, these plugs can wear out or get dirty. This section will guide you through troubleshooting your spark plugs.
Inspecting For Damage
Start by checking the spark plugs for visible damage. Look for cracks or chips on the ceramic part. Any signs of wear can prevent the plug from working. Also, check the metal tip. It should be clean and free from corrosion. If you see rust or buildup, it may need attention.
Next, examine the wiring connected to the spark plugs. Look for frayed wires or loose connections. Damaged wires can stop the spark from reaching the plug. Ensure all connections are tight. This simple check can often solve starting issues.
Cleaning Or Replacing Spark Plugs
If the plugs are dirty, cleaning them can help. Use a wire brush or a specialized cleaner. Remove any carbon buildup. This process can restore the plug’s function. After cleaning, check the gap between the electrodes. It should match the manufacturer’s specs.
Sometimes, cleaning isn’t enough. If the plugs are too worn, they need replacing. Purchase new spark plugs that fit your generator. Installing new plugs is usually simple. Just unscrew the old ones and screw in the new ones. This step can make your generator start easily again.
Oil And Lubrication Checks
Oil and lubrication checks are crucial for a generator that won’t start after sitting idle. Old or low oil levels can cause engine issues. Regular maintenance ensures smooth operation and helps avoid starting problems when you need your generator the most.
Checking oil and lubrication is crucial for keeping your generator in top shape, especially after it has been sitting idle for a while. Neglecting these elements can lead to serious issues and ultimately prevent your generator from starting. Regular maintenance of oil and lubrication ensures smooth operation, extending the lifespan of your equipment.Measuring Oil Levels
Start by checking the oil level in your generator. This is a simple yet vital step. – Locate the dipstick: Most generators have a dipstick for measuring oil. Remove it and wipe it clean. – Reinsert the dipstick: Push it back in, then pull it out again to check the oil level. Ensure it falls within the recommended range. If the oil level is low, add oil to reach the proper level. Using the right type of oil is essential. Refer to your owner’s manual for specifications. Have you ever faced a generator that wouldn’t start because of low oil? It can be frustrating, especially during an emergency. Keeping your oil levels topped off can save you from this headache.Replacing Old Oil
Old oil can thicken and lose its effectiveness, leading to poor lubrication. This can be a major reason why your generator won’t start after sitting for some time. – Change your oil regularly: Aim for every 50 hours of use or at least once a year. – Drain the old oil: Use a suitable container to collect the old oil, making sure to dispose of it properly. After draining, refill with fresh oil, ensuring it meets the manufacturer’s specifications. Consider keeping a schedule for oil changes. Mark it on your calendar or set reminders on your phone. This small act can make a huge difference in keeping your generator reliable. Have you checked your oil lately? Regular maintenance can mean the difference between a reliable generator and one that fails when you need it most.Priming The Generator
Priming the generator is essential after it sits for a while. This process ensures fuel reaches the engine. Without proper priming, the generator may not start. Let’s explore two effective methods to prime your generator.
Using The Choke
The choke helps start the engine by restricting airflow. This action increases fuel flow to the engine. Locate the choke lever on your generator. Set it to the “choke” position before starting the engine.
After setting the choke, pull the starter cord. The engine should start easily. Once it runs smoothly, move the choke back to the “run” position. This ensures proper airflow for continued operation.
Manually Priming The Fuel System
Sometimes, manual priming is needed. This method helps fuel reach the engine directly. First, locate the fuel primer bulb. Press it several times until you feel resistance.
Once primed, try starting the generator. This method often fixes starting issues after long periods of inactivity. Remember to check the fuel level before attempting to start.
Credit: wenproducts.com
Dealing With Engine Stale Start
Generators may struggle to start after sitting unused for a while. Old fuel and stale oil can cause this issue. Regular maintenance and checking fuel quality help keep your generator in good shape.
Dealing with an engine that won’t start after sitting for a while can be frustrating. Stale fuel is often the culprit, leaving deposits that can clog your generator’s engine. Tackling this issue requires some practical steps. Let’s dive into how to effectively manage stale fuel in your generator.Removing Stale Fuel Deposits
Start by draining the old fuel from your generator. Stale fuel can cause serious problems, so it’s vital to get rid of it. – Use a siphon pump to remove the fuel from the tank. This keeps things clean and efficient. – Inspect the fuel filter for any clogs or debris. A dirty filter can hinder fuel flow and cause starting issues. – After draining, consider cleaning the fuel tank. Use a mild detergent and warm water. Rinse thoroughly to avoid any cleaning residue. Once you’ve cleaned everything, refill the tank with fresh fuel. This step is crucial for ensuring your generator has the right resources to operate properly.Adding Fuel Stabilizers
Adding a fuel stabilizer can be a game changer for your generator. These additives help prevent fuel from breaking down and forming deposits. – Choose a stabilizer that suits your generator type. Read the label carefully for guidance on the appropriate amount. – Pour the stabilizer into your fresh fuel before filling the tank. This helps mix it evenly. – Run the generator for about 10-15 minutes after adding the stabilizer. This ensures the solution reaches the entire fuel system. By taking these steps, you can avoid the headache of a generator that refuses to start. Have you ever faced a similar issue? What solutions have you found effective? Your experiences could help others facing the same problem.Testing For Mechanical Issues
Testing for mechanical issues is key when a generator won’t start after sitting idle. Check the fuel level, battery connections, and oil levels first. Simple troubleshooting can help identify the problem and get your generator running again.
Testing for mechanical issues is a crucial step when your generator won’t start after sitting idle. It’s easy to overlook the physical components that may have deteriorated over time. Understanding how to inspect these parts can save you time and money.Inspecting Belts And Pulleys
Start by examining the belts and pulleys. These components are vital for the generator’s operation. – Look for any signs of wear, such as fraying or cracking on the belts. – Pulleys should rotate freely without any obstruction. If you notice any damage, it’s often best to replace the belts immediately. A worn belt can slip or break, causing your generator to fail. Have you ever been caught in a storm, only to find your generator won’t start? A simple inspection of these components could have made all the difference.Checking For Internal Damage
Next, turn your attention to the internal parts. Mechanical issues can often stem from internal damage, which is less visible but just as critical. – Remove the generator cover and check for signs of rust or corrosion. – Inspect the engine components, such as the flywheel and crankshaft, for any cracks or bends. Even small issues can lead to significant problems down the line. If you find something concerning, don’t hesitate to consult a professional. Consider how frustrating it is to have a generator that won’t start when you need it most. Taking the time to check for these mechanical issues can save you from unexpected disappointments. Have you recently performed maintenance on your generator? Regular checks can prevent these issues before they arise.
Credit: www.facebook.com
Preventive Measures For Long Storage
Taking care of your generator before storing it is vital. Proper steps can help prevent problems later. A few simple measures can keep your generator in good shape. Let’s explore effective methods.
Using Fuel Stabilizers
Fuel stabilizers help keep fuel fresh. They slow down oxidation and prevent gum buildup. Add a stabilizer to your fuel tank before storage. Follow the instructions on the product label. This helps ensure your generator starts easily after long periods.
Run the generator for a few minutes after adding stabilizer. This allows the stabilizer to mix with the fuel. It also ensures that the entire fuel system gets treated. This simple step can save you time and hassle later.
Regular Maintenance Schedule
Setting a maintenance schedule is important for your generator. Check the oil level and change it regularly. Clean or replace the air filter as needed. Inspect the spark plugs and replace them if they look worn.
Performing regular maintenance helps catch small issues early. This way, you avoid big problems later on. Store your generator in a clean, dry place. Protect it from dust and moisture. Following these steps ensures that your generator stays reliable.
Frequently Asked Questions
Why Won’t My Generator Start After Sitting?
Generators may fail to start after sitting due to stale fuel or a dead battery. Fuel can degrade over time, leading to clogs in the fuel system. Additionally, batteries may lose charge if not maintained. Regular checks and maintenance can prevent these issues.
How Can I Troubleshoot A Non-starting Generator?
Start by checking the fuel level and battery charge. Inspect for any visible damage or leaks. Ensure the fuel is fresh and the oil is at the correct level. If these steps don’t resolve the issue, consider checking the spark plug and connections.
What Maintenance Prevents Generator Starting Issues?
Regular maintenance includes changing the oil, replacing the fuel, and inspecting the battery. Clean or replace the air filter, and check the spark plug condition. Additionally, running the generator periodically helps keep components lubricated and prevents fuel degradation.
Can Old Fuel Cause Starting Problems?
Yes, old fuel can cause significant starting problems. It can become stale and lose combustibility, leading to engine failure. Stale fuel can also clog fuel lines and filters. It’s crucial to use fresh fuel or add a fuel stabilizer if the generator is not used often.
Conclusion
A generator that won’t start can be frustrating. Simple steps can often fix the problem. Check the fuel level first. Old fuel can cause issues. Also, inspect the spark plug. A dirty or worn spark plug needs replacement. Clean the air filter for better airflow.
Regular maintenance helps prevent these problems. Always store the generator properly. Following these tips can keep your generator running smoothly. Stay prepared for any power outage. A little care goes a long way. Enjoy the peace of mind that comes with a reliable generator.