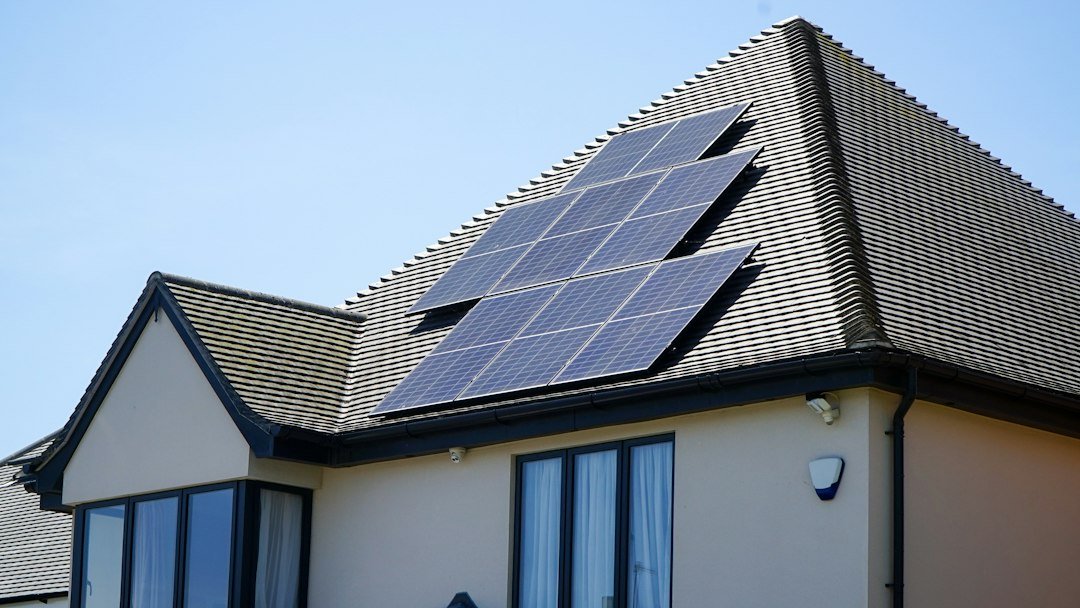
Installing solar panels involves more than mounting modules on a roof. A typical U.S. residential project starts with an electricity-use review and site assessment, followed by system design, permits, installation, inspection, utility approval, and a homeowner handover. The exact order and requirements depend on your location, utility, roof, and equipment.
For a permanent rooftop system, use appropriately qualified solar and electrical professionals. Roof work presents fall risks, and photovoltaic equipment can produce hazardous electricity when exposed to light. This guide explains the process and the decisions homeowners should understand; it is not a wiring or rooftop work manual.
Solar installation at a glance
A well-planned project follows a sequence. First decide whether your priority is reducing a utility bill, providing backup during outages, or both. Next, evaluate the property and obtain comparable proposals. The contractor prepares an equipment design and applicable permit and utility applications. After approvals, qualified crews install the hardware and electrical equipment. The system is inspected, any utility requirements are completed, and the homeowner receives operating and warranty information.
The U.S. Department of Energy explains that permitting and inspection requirements vary between local governments. Do not assume a neighbor’s project had the same approvals, equipment, or utility conditions. Ask the contractor who is responsible for each step and what must happen before the system is authorized to operate.
Step 1: Review your electricity use and goals
Collect approximately a year of electricity bills if available. Record monthly kilowatt-hours, charges, and seasonal differences. Consider future changes such as an electric vehicle, a heat pump, or changes in household occupancy. A system designed around one summer bill may not reflect your annual use.
Separate three goals: reducing purchased electricity, offsetting a portion of annual usage, and providing power during a grid outage. A system that is estimated to generate as much electricity as a home uses over a year does not necessarily power the home every hour or work during an outage. Backup requires suitable equipment, controls, isolation, and an appropriately designed load plan.
Give each installer the same information and ask for an annual production estimate with its assumptions. Our guide to how many solar panels a house needs explains the sizing questions in more detail.
Step 2: Assess the roof and property
An installer should evaluate available space, roof condition, orientation, structural suitability, shade, and access. Trees, chimneys, nearby buildings, and future construction can affect sunlight. Ask how the company accounts for shade at different times of day and year rather than accepting a single photograph as the full assessment.
If the roof may need replacement soon, discuss that before solar is installed. Removing and reinstalling an array later can involve additional work and expense. Ask who assesses the roof, who is responsible for roof penetrations and waterproofing, and how roof and solar warranties interact. A solar contractor’s proposal should make any needed roof work and exclusions clear.
Ground-mounted systems may be an option on some properties, but they introduce their own site, trenching, access, land-use, and permitting questions. The cheapest-looking location on a sketch is not necessarily the best finished project. The contractor should review the actual property and local requirements.
Step 3: Compare written proposals
Request proposals that identify the panel and inverter models, the array’s DC capacity, estimated annual production, mounting equipment, monitoring, and applicable warranties. Ask whether the price includes design, labor, permits, inspection, utility interconnection, taxes, and any electrical upgrade. If a battery or roof work is optional, request separate line items.
Compare the same project scope. A quote with fewer panels, no electrical upgrade, or a different backup capability may have a lower total for reasons unrelated to value. Ask which prices are fixed, which are allowances, and what conditions trigger a change order. Keep the payment schedule, cancellation terms, projected timeline, and workmanship warranty in writing.
For financing, compare the cash price with the complete repayment amount, including fees and interest. A zero-down offer may still create a long-term obligation. Leases and power-purchase agreements involve different ownership terms, payment rules, and arrangements when the home is sold. Our solar panel cost guide includes a quote comparison and current federal homeowner credit information.
Step 4: Confirm the system design
The contractor prepares a design that identifies the array, mounting, inverter, electrical connection, and equipment locations. Ask where panels and visible conduits will go, how the design addresses shade, and what changes may be necessary after a site visit. Confirm the module count and total capacity in the final proposal.
The design must suit the roof and electrical service. String inverters, microinverters, and systems using optimizers have different equipment arrangements. Ask the installer why the selected design fits the property, what the monitoring system can show, and which component warranties apply. For a plain-language explanation of panels and inverters, see how solar panels work.
If you want backup power, ask for a separate load plan. Identify whether the system should support selected circuits or broader home loads during an outage. Request the inverter’s continuous and starting capability, the battery’s usable capacity if included, and whether the panels can recharge it while the grid is down. “Battery ready” does not by itself establish outage operation.
Step 5: Arrange permits and utility interconnection
Many U.S. jurisdictions require permits and inspections for rooftop solar. Requirements differ by local authority, project type, and equipment. The utility may also require an interconnection application and approval for a grid-connected system. Ask the installer to identify each authority, required application, expected fee, and responsible party.
Do not operate a grid-connected system merely because the panels are on the roof. Follow the utility’s permission-to-operate process and the installer’s instructions. The sequence can vary by jurisdiction, so ask what approvals are needed before installation and before energizing or exporting power. Keep copies of approved plans, permits, inspection results, and utility correspondence.
Also ask about utility billing. Export compensation and fixed charges depend on the tariff and local policies. A production estimate is not the same thing as a bill-savings guarantee. Have the provider explain the applicable tariff and any assumptions used in the financial proposal.
Step 6: Prepare for installation day
Confirm the installation date, access needs, equipment delivery, and who will be on site. Ask whether vehicles, pets, or stored items need to be moved and whether there will be a planned electrical interruption. Make sure the crew has a point of contact for questions about panel placement or unexpected site conditions.
The physical installation may be completed faster than the entire project. DOE notes that permitting and inspection can take substantially longer than the onsite work. A date when panels are mounted is not necessarily the date the utility authorizes operation. Ask the contractor for the expected milestones and who will communicate any delay.
Before work begins, document the roof and property condition as appropriate. If the design or equipment changes, request an updated scope and any price adjustment in writing. Do not assume a verbal substitution has the same output, monitoring, warranty, or permit status as the equipment you originally accepted.
Step 7: Professional mounting and electrical work
Qualified crews install the approved mounting system, modules, inverter or microinverters, wiring, and required electrical equipment according to the final design and product instructions. The exact method depends on the roof, mounting hardware, system type, and applicable requirements. The installation should also address cable management, weather protection, and roof integrity.
Homeowners should not climb onto a roof, connect solar conductors, open electrical panels, or improvise a grid connection. Solar equipment may remain energized in daylight even when another part of the system is switched off. If you observe damaged components, exposed wiring, or unsafe conditions, keep clear and contact the installer or an appropriate professional.
The installer should identify any equipment substitutions, changes to the layout, or site conditions that require revised approvals. Ask for the final equipment list after work is complete. A photograph of panels on the roof does not establish that electrical testing, inspection, and utility authorization have been completed.
Step 8: Inspection, approval, and commissioning
After installation, the required inspection process checks the project against applicable requirements. The utility may have additional interconnection steps before permission to operate. Ask the contractor what has passed, what remains open, and who will provide the final documents. Requirements and timing vary by jurisdiction.
Commissioning should include the installer’s checks under the equipment instructions and an explanation of the system’s normal operation. Ask how to recognize an alert, who to call if monitoring stops, and what maintenance is expected. If the system includes backup, request a demonstration of the installed backup arrangement and its limits.
Keep the approved plans, inspection records, permission-to-operate documentation where applicable, equipment manuals, warranty terms, and service contacts together. These records are useful for insurance, future roof work, maintenance, and a later property sale.
What about batteries and power outages?
Solar panels alone do not guarantee power during a utility outage. A conventional grid-connected system normally shuts down when the grid is unavailable. A backup-capable system needs compatible controls and equipment designed to isolate and supply the designated loads. Some systems use batteries; product-specific features and limitations vary.
Ask the installer to describe the intended backup circuits, continuous and starting power limits, usable storage capacity, and recharging behavior. Large air conditioners, electric ranges, heaters, well pumps, and vehicle chargers can affect the design. A home may need to prioritize certain loads during an outage even when its solar array is sizable.
Learn more about the distinction between annual solar production and round-the-clock supply in can solar panels power a house? Do not assume an annual 100% offset estimate means an outage backup system is included.
How long does solar installation take?
There is no single schedule for every home. The process can include proposal review, site assessment, engineering, permit review, equipment availability, physical work, inspection, and utility approval. Weather, roof repairs, contractor scheduling, and local administrative queues can change the timeline.
Ask for dates or estimated ranges for each milestone and identify which steps are outside the contractor’s direct control. Request updates when an application is submitted, an inspection is scheduled, or utility approval is received. Treat an estimated completion date as a forecast until the relevant approval and work are actually complete.
Can you install solar panels yourself?
Some small, portable products are designed for consumer setup under their specific manuals. A permanent residential rooftop and grid-connected installation is a different project involving roof work, electrical design, equipment compatibility, permits, and utility rules. DOE advises that construction personnel who are not qualified to install solar equipment should not perform the installation work.
If you want to participate in parts of a project, ask the qualified installer and the local authority which tasks are permitted and how responsibilities, inspections, and warranties will work. Do not assume a DIY kit removes the need for approved electrical work or permission to connect to the utility. Choose safe, authorized work for the actual equipment and property.
Questions to ask before signing
- Who will perform the work, and what qualifications and insurance apply?
- What panel and inverter models, system capacity, and expected annual production are included?
- Does the quote include permits, inspections, interconnection fees, electrical upgrades, and roof work?
- Who is responsible for utility approval, and when can the system operate?
- What warranties cover equipment, workmanship, and roof penetrations?
- Does the system include battery storage or outage backup, and which loads are supported?
- What are the payment schedule, financing fees, cancellation terms, and change-order rules?
- What documents and operating instructions will I receive at handover?
Frequently asked questions
Do I need a permit to install solar panels?
Many local governments require permits and inspections for rooftop solar, but the exact requirements vary. Ask the installer and local authority about the planned project before work begins.
Can I turn the system on as soon as the panels are installed?
Do not assume so. A grid-connected system may require inspection and utility permission to operate. Follow your installer’s and utility’s instructions.
Is a battery required?
Not for every grid-connected system. Storage is a separate design choice. If outage backup is important, ask what equipment and configuration are required for the loads you want to support.
Will solar work during a power outage?
A conventional grid-tied system usually shuts down when utility power fails. Backup operation depends on compatible equipment and an appropriately installed system.
How do I know whether the installation is complete?
Confirm that the agreed work, required inspections, utility authorization, commissioning, and handover have been completed. Keep the records and understand whom to contact for service.
A successful solar installation begins with the right goals and ends with documented approvals, a clear operating plan, and a complete handover. Compare proposals on the same scope and use qualified professionals for the work.
Featured photo: Watt A Lot / Unsplash.
Sources: U.S. Department of Energy: Permitting and Inspection; DOE: Consumer Guide to Going Solar; DOE: Solar Energy Guide for Homebuilders.