

When your generator floods, it can feel overwhelming and stressful. You depend on this equipment for power, especially during outages or emergencies.
The last thing you want is to face another problem when you need it most. But don’t panic—there are steps you can take to get your generator back on track. You’ll learn exactly what to do when a generator floods, from immediate actions to prevent further damage, to tips for future maintenance.
By the end, you’ll feel more confident and prepared to handle any situation. Let’s dive in and help you protect your investment.

Credit: au.jackery.com
Signs Of A Flooded Generator
Recognizing a flooded generator is crucial for safety and repairs. Flooding can happen when too much fuel enters the engine. This may lead to starting issues and engine damage. Here are some key signs to watch for.
Difficulty Starting
One of the first signs is trouble starting the generator. The engine may turn over but not start. This often means fuel has flooded the system.
Strong Fuel Odor
A strong smell of gasoline is another clear sign. If you notice a gas-like scent, the generator may be flooded. This odor can indicate that excess fuel has entered the engine.
Excessive Smoke
Look for excessive smoke coming from the exhaust. Thick, black smoke usually means that too much fuel is burning. This indicates a flooded engine that needs immediate attention.
Engine Stalling
Stalling or sputtering can also signal flooding. The engine may run for a short time but then stop suddenly. This happens when fuel overwhelms the engine’s system.
Unusual Noises
Listen for unusual noises during operation. If you hear knocking or popping sounds, it may point to flooding. These sounds often mean fuel is not burning properly in the engine.
Immediate Steps To Take
Experiencing a flooded generator can be stressful, especially if you rely on it for power during outages. Taking immediate action is crucial to prevent further damage and ensure safety. Here are the essential steps you should take right away.
Turn Off The Generator
Your first action should be to shut down the generator. This prevents electrical hazards and minimizes the risk of damage. If water has entered the generator, turning it off immediately can save you from costly repairs.
Disconnect Fuel Sources
Next, disconnect any fuel sources. If you have a gas generator, turn off the fuel valve. This step helps stop any fuel leaks and reduces fire risks.
Assess The Situation
Take a moment to assess the extent of the flooding. Look for signs of water inside the generator and check the surrounding area. Understanding the situation will help you determine your next steps.
Remove Water
Use a wet/dry vacuum or towels to remove standing water from the generator. Getting rid of excess water is vital for preventing rust and corrosion. Don’t forget to check the air filter and remove any moisture there as well.
Dry And Ventilate
After you’ve removed the water, allow the generator to dry completely. Open any access panels to help with ventilation. Consider placing the generator in a sunny spot or using fans to speed up the drying process.
Inspect For Damage
Look for any visible signs of damage. Check electrical connections, the fuel system, and the engine. If you see any corrosion or rust, it might be time to call a professional.
Test The Generator
Once everything is dry and you’ve inspected for damage, it’s time to test the generator. Start it up and watch for any unusual noises or issues. If everything sounds good, you may be back in business!
Have you ever dealt with a flooded generator before? Sharing your experience could help others avoid the same pitfalls. Remember, acting quickly can make all the difference in getting your generator back to working order.
Draining Excess Fuel
After a generator floods, draining excess fuel is crucial. This process prevents damage and keeps your generator safe. Excess fuel can lead to leaks or engine problems. Taking care of it quickly can save you from larger issues later.
Locate The Fuel Valve
The first step is to find the fuel valve. This valve controls the flow of fuel to the engine. It is usually near the fuel tank. Make sure the generator is off before you begin.
Prepare A Container
Get a clean container to catch the fuel. It needs to be safe and sturdy. A plastic or metal container works well. Ensure it can hold the amount of fuel you expect to drain.
Open The Fuel Valve
Carefully open the fuel valve. Allow the excess fuel to flow into your container. Monitor the flow closely. Stop when the container is full to avoid spills.
Dispose Of Fuel Properly
After draining, dispose of the fuel correctly. Check local laws for disposal guidelines. Never pour fuel down the drain or throw it in the trash. Use a hazardous waste facility for safe disposal.
Check For Leaks
Inspect the generator for any leaks. Look around the fuel lines and connections. Any signs of leaks need immediate attention. Fixing them early prevents future flooding.
Restart The Generator
Once everything is checked, restart the generator. Observe its performance. Ensure it runs smoothly without issues. Regular maintenance helps avoid flooding in the future.
Checking The Spark Plug
After a generator floods, checking the spark plug is essential. A spark plug ensures the engine starts properly. Flooding can cause fuel to enter the spark plug area. This can lead to misfires or no starts at all.
Remove The Spark Plug
Begin by turning off the generator. Allow it to cool down completely. Use a spark plug wrench to carefully remove the spark plug. Keep track of any parts you remove.
Inspect The Spark Plug
Look closely at the spark plug. Check for signs of wetness or fuel build-up. A wet spark plug indicates flooding. This means it can’t create a spark. Clean it with a wire brush if it appears dirty.
Dry The Spark Plug
After inspection, allow the spark plug to dry. Place it in a warm area for a few minutes. Ensure it is completely dry before reinstalling. A dry spark plug will help the engine start.
Reinstall The Spark Plug
Once dry, carefully reinstall the spark plug. Tighten it securely but do not over-tighten. Reconnect any wires or components you removed. Make sure everything is back in place.
Test The Generator
After reinstalling the spark plug, turn on the generator. Listen for the engine to start smoothly. If it runs well, the spark plug was likely the issue. If not, further checks may be necessary.
Clearing The Carburetor
When your generator floods, one of the most critical steps to take is clearing the carburetor. A flooded carburetor can prevent your generator from starting and running smoothly. Understanding how to clear it effectively can save you time and hassle, ensuring your generator is back in action quickly.
Understanding The Carburetor’s Role
The carburetor mixes air and fuel for combustion. If it floods, it means there’s too much fuel in the mixture, disrupting this balance. This can lead to issues like starting failures or rough running.
Gathering Your Tools
Before you start, make sure you have the right tools on hand:
- Wrench or socket set
- Screwdriver
- Clean cloths or rags
- Fuel line clamp (optional)
Accessing The Carburetor
Locate the carburetor on your generator. It’s usually near the engine and connected to the fuel tank. Remove the cover or any obstacles to access it easily.
Draining The Fuel
To clear the carburetor, you may need to drain excess fuel. Look for a drain screw at the bottom of the carburetor. Use your wrench to open it and let the fuel flow out into a container.
Cleaning The Carburetor
After draining, use a clean cloth to wipe away any debris inside the carburetor. If you notice sticky residue, consider using a carburetor cleaner. Apply it according to the product instructions for best results.
Reassembling The Generator
Once cleaned, carefully reassemble the carburetor. Ensure all screws and connections are tight to prevent leaks. Double-check that everything is in place before starting the generator again.
Testing The Generator
After reassembly, it’s time to test your generator. Start it up and observe how it runs. Does it sound smoother? If it still struggles, further investigation may be needed.
Clearing the carburetor is a straightforward process, but it requires attention to detail. Have you ever faced a flooded generator? What steps did you take to resolve the issue? Your experience could help others in similar situations.

Credit: www.epa.gov
Inspecting Air Filters
Inspecting air filters is crucial after a generator floods. Clogged or dirty filters can cause problems. Clean or replace them to ensure proper airflow and performance. This simple step helps protect your generator from further damage and keeps it running smoothly.
Inspecting air filters is a crucial step when dealing with a flooded generator. A generator that has been submerged in water can face various operational issues, and the air filter often takes the brunt of the damage. It’s essential to check this component carefully to ensure your generator runs effectively once the flooding situation is resolved.
Why Air Filters Matter
Air filters play a vital role in your generator’s performance. They prevent dust, debris, and moisture from entering the engine. When these filters are compromised by flooding, they can lead to poor engine performance or even permanent damage.
Steps To Inspect Your Air Filters
1. Power Off the Generator Always ensure the generator is completely powered off before you start any inspection. This keeps you safe and prevents any accidental damage. 2. Remove the Air Filter Cover Locate the air filter cover and carefully remove it. Depending on your generator model, you may need a screwdriver or a simple twist. 3. Examine the Filter Check for any signs of water damage or debris. A wet or clogged filter should be replaced immediately to restore proper airflow.
Cleaning Or Replacing The Filter
If the air filter appears dirty but is not damaged, you may be able to clean it. Use a gentle brush or compressed air to remove dust and debris. If the filter is soaked or torn, replacing it is the best option. – Cleaning Tips: – Use mild soap and water for washable filters. – Allow it to dry completely before reinstallation. – Replacement Tips: – Always refer to your generator’s manual for the right specifications. – Ensure the new filter fits snugly to avoid air leaks.
Final Checks
After inspecting and cleaning or replacing the air filter, reattach the cover securely. Start the generator and listen for any unusual sounds. A properly functioning air filter will ensure smoother operation. What steps have you taken to maintain your generator? Regular maintenance can prevent future flooding issues and keep your equipment running smoothly.
Preventing Future Flooding
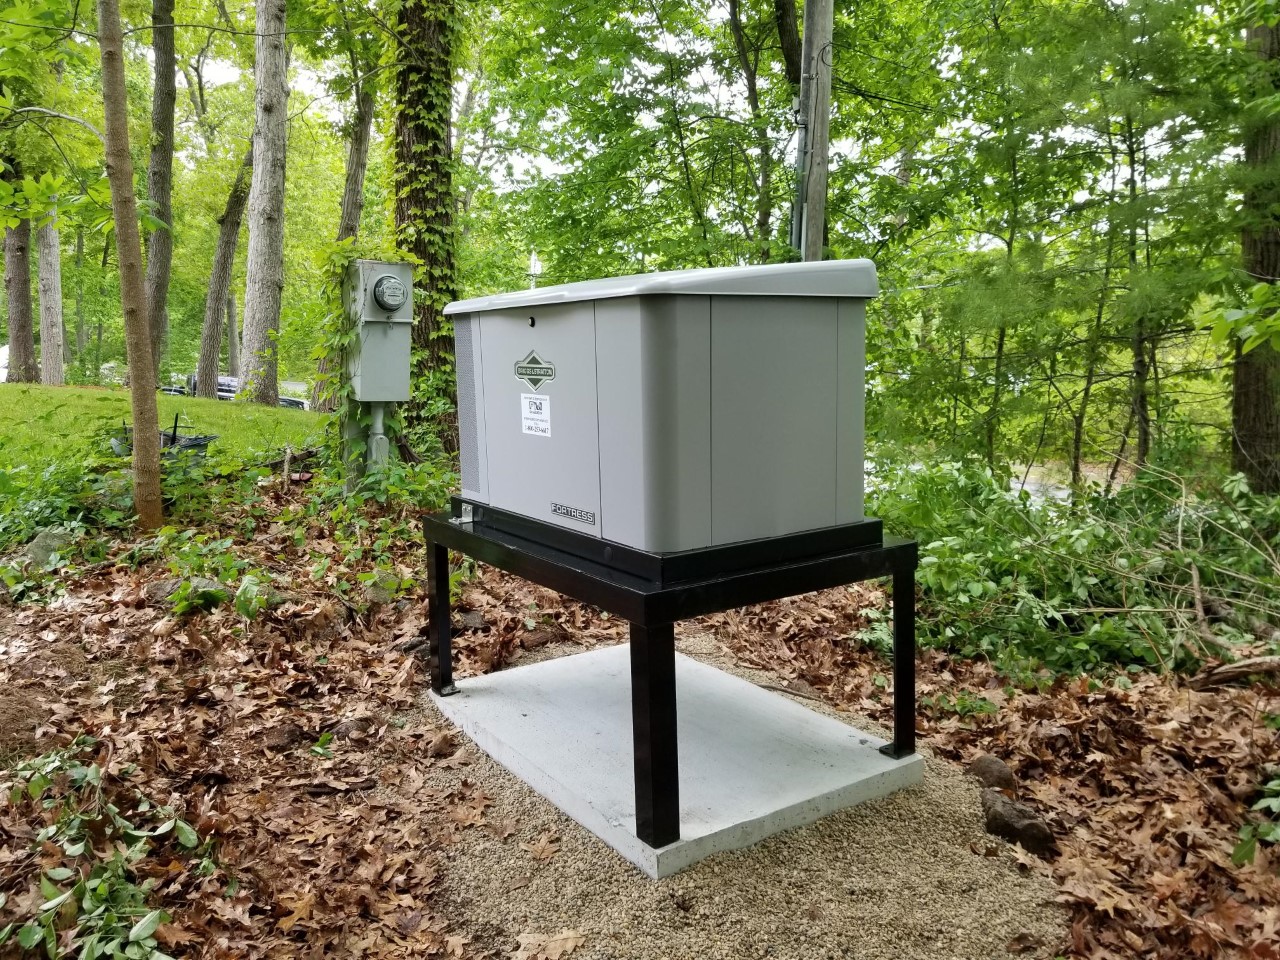
Preventing flooding in your generator is essential. It saves you time and money. Simple steps can keep your generator safe and dry.
Choose The Right Location
Place your generator on higher ground. Avoid low spots where water collects. Make sure it is away from heavy rain runoff.
Use A Generator Cover
A good cover protects your generator. Choose a waterproof cover. This will keep rain and snow out.
Install A Drainage System
Consider adding drainage around your generator. This helps direct water away. French drains or gravel can work well.
Regular Maintenance Checks
Check your generator regularly. Look for signs of wear and tear. Clean it often to avoid dirt buildup.
Inspect Fuel Lines And Connections
Check fuel lines for leaks. Ensure all connections are tight. This reduces the risk of flooding from fuel spills.
Store Fuel Properly
Keep fuel in a safe, dry place. Use sealed containers to prevent leaks. Avoid storing fuel near the generator.
When To Seek Professional Help
A flooded generator can cause serious damage. Seek professional help if water enters the engine or electrical parts. Acting quickly can prevent costly repairs and ensure safety.
When dealing with a flooded generator, knowing when to seek professional help can save you time, money, and frustration. Many users underestimate the risks involved, thinking they can manage everything on their own. However, some situations demand expert intervention for your safety and the longevity of your generator.
Recognizing Serious Damage
If you notice signs of serious damage, it’s time to call in a professional. Look for: – Corrosion on metal parts – Burning smells from the engine – Oil leaks or abnormal fluid levels Any of these issues can signal that your generator has sustained significant harm. Ignoring them could lead to more extensive repairs down the line.
Electrical Issues
Flooding can lead to dangerous electrical problems. If your generator won’t start or trips breakers frequently, don’t take chances. Water can cause short circuits, which might result in fires. You need an expert to diagnose and fix these issues safely.
Expert Cleaning And Maintenance
Sometimes, you might think you’ve cleaned everything up, but hidden moisture can linger. Professionals have the right tools and knowledge to conduct a thorough cleaning. They can also check for mold or other contaminants that could pose health risks. Have you considered how much damage could occur from neglecting this step?
Insurance And Warranty Considerations
If your generator is still under warranty or insured, seeking professional help may be a requirement. Documenting the issue with an expert can be crucial for claims. Failing to do so could leave you with hefty repair bills you didn’t anticipate. Knowing when to seek help ensures that you protect your investment and maintain safety. Don’t hesitate to reach out to professionals if you’re unsure about the state of your flooded generator. Your peace of mind is worth it.
Credit: www.fmgenerator.com
Frequently Asked Questions
What Causes A Generator To Flood?
Generators can flood due to excessive rain, improper storage, or fuel leaks. Water entering the engine can mix with oil, leading to serious damage. It’s essential to store generators in a dry, covered area to prevent flooding. Regular maintenance checks can also help identify potential issues before they escalate.
How Do I Prevent My Generator From Flooding?
To prevent flooding, always store your generator in a dry location. Use a waterproof cover when not in use. Regularly inspect fuel lines and connections for leaks. Additionally, ensure proper drainage around the generator area to divert rainwater. Following these steps will help minimize flooding risks effectively.
What Should I Do If My Generator Floods?
If your generator floods, first turn it off immediately. Disconnect the fuel supply and let it dry out completely. Check for water in the oil and change it if necessary. Consult the manufacturer’s guidelines or a professional technician for further assistance.
Taking these steps ensures safe restoration of your generator.
Is It Safe To Run A Flooded Generator?
Running a flooded generator is not safe. Water in the engine can cause severe damage and lead to electrical hazards. Always ensure the generator is completely dry before attempting to start it again. If unsure, consult a professional technician for a thorough inspection and guidance on safe operation.
Conclusion
Flooding a generator can be stressful. Acting quickly is essential. Start by turning off the generator and disconnecting it from any power source. Clean and dry the affected parts. Let the generator sit for a while to dry completely. Check for damages before restarting it.
If problems persist, contact a professional for help. Proper care can prevent future issues. Stay safe and maintain your generator regularly. This way, you ensure it works well when you need it most. Take these steps to protect your investment and keep your power reliable.