
Have you ever experienced flickering lights or a generator that just won’t start? These issues could point to a bad generator capacitor.
Understanding how to identify a faulty capacitor can save you time, money, and the frustration of unexpected power outages. You’ll discover simple signs that indicate a capacitor may be failing, along with easy troubleshooting tips. By the end, you’ll feel more confident in diagnosing your generator’s health.
Don’t let a bad capacitor leave you in the dark—read on to protect your power supply!

Credit: www.pumpspluscapecoral.com
Signs Of A Faulty Capacitor
Recognizing a faulty generator capacitor can save you time, money, and headaches. Capacitors play a crucial role in the functioning of your generator. Understanding the signs of a faulty capacitor can help you address issues before they escalate.
Unusual Noises
Listen closely to your generator. A buzzing, humming, or clicking sound may indicate capacitor problems. These noises often suggest that the capacitor is struggling to maintain proper functionality.
Difficulty Starting
Does your generator struggle to start? A bad capacitor can lead to issues with the starting mechanism. If you find yourself repeatedly pulling the starter cord with no success, it’s time to investigate further.
Frequent Tripping Of Circuit Breakers
Pay attention to your circuit breakers. If they trip frequently when you run the generator, this could signal a faulty capacitor. This issue can lead to equipment damage if not addressed promptly.
Dim Or Flickering Lights
Have you noticed dim or flickering lights when your generator is running? This inconsistency can be a clear sign of a failing capacitor. The capacitor is responsible for stabilizing voltage, so fluctuations may indicate a problem.
Overheating
Feeling excessive heat from your generator? Overheating can be a result of a faulty capacitor. If the capacitor can’t store and release energy properly, it may lead to overheating, causing further damage to your generator.
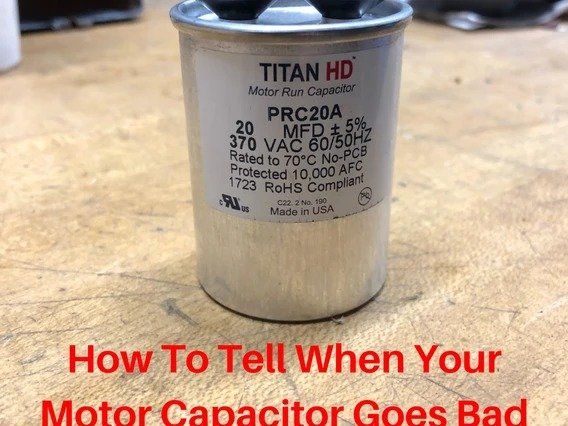
Physical Damage
Inspect the capacitor for visible damage. Look for signs like bulging, leakage, or corrosion. If you see any of these, it’s a strong indicator that the capacitor needs replacement.
Have you experienced any of these signs with your generator? Taking action quickly can help you avoid larger issues down the line. Addressing a faulty capacitor not only ensures your generator runs smoothly but also extends its lifespan.
Impact On Generator Performance
The performance of your generator heavily relies on its capacitor. A failing capacitor can lead to numerous issues, affecting the generator’s efficiency and reliability. Understanding how a bad capacitor impacts your generator can save you time and money.
Loss Of Power Output
A damaged capacitor can result in a significant drop in power output. You might notice that your generator struggles to start or fails to maintain a steady power level during operation. This can be frustrating, especially if you depend on your generator for critical tasks.
Consider a time when you needed your generator during a power outage. If it couldn’t deliver the expected output, you likely felt the impact right away. A faulty capacitor often causes this power loss, leaving you in the dark.
Increased Fuel Consumption
If your generator’s capacitor is bad, you may find that it consumes more fuel than usual. This inefficiency leads to higher operational costs. You might be puzzled by the sudden increase in expenses, unaware that the capacitor is the culprit.
Have you ever calculated your generator’s fuel usage? A bad capacitor can force your generator to work harder, leading to unanticipated fuel bills. Keeping an eye on this can help you identify issues early.
Frequent Overheating
A failing capacitor often leads to overheating. Over time, this can cause irreversible damage to your generator’s internal components. You might notice that your generator shuts off unexpectedly due to overheating, a clear sign of capacitor trouble.
Picture this: you’re in the middle of a crucial task, and suddenly your generator dies. This can happen when the capacitor fails to regulate power properly. Staying vigilant about these signs can help you avoid frustrating interruptions.
Unusual Noises And Vibrations
Another indicator of a bad capacitor is the presence of unusual noises or vibrations. If your generator starts to sound different, it’s a red flag. These noises often signify that the generator is struggling to function optimally.
Have you ever heard a strange humming or buzzing noise while your generator was running? This can be a telltale sign of capacitor issues. Addressing these symptoms promptly can prevent more extensive damage down the road.
Difficulty Starting
Do you find that your generator has trouble starting? A bad capacitor might be the reason behind this persistent issue. Generators rely on capacitors for starting power, and a failing one can lead to frustrating start-up problems.
Reflect on your last attempt to fire up your generator. If you had to try multiple times before it finally started, it’s time to investigate the capacitor. Catching this problem early can save you from being left in the lurch during emergencies.
Monitoring these signs can help you maintain your generator’s health. If you suspect a bad capacitor, consider having it inspected or replaced. Taking proactive steps ensures your generator remains reliable when you need it most.
Physical Indicators Of Damage
A bad generator capacitor can show clear signs of damage. Look for bulging, leaking, or burnt areas on the capacitor. These physical indicators often mean it needs to be replaced for safe and efficient operation.
Identifying a bad generator capacitor can save you time and money. Physical indicators of damage are often the first clues that something is wrong. Knowing what to look for can help you make quick decisions about repairs or replacements.
Bulging Or Swelling
One of the most obvious signs of a bad capacitor is bulging or swelling. If you notice that the capacitor is not flat or has a dome shape, it’s a clear indicator of internal failure. Touch it carefully. If it feels soft or spongy, it’s time for a replacement.
Leaking Fluid
Check for any signs of leaking fluid around the capacitor. A healthy capacitor should be dry and clean. If you spot any oily or sticky residue, it’s likely that the capacitor has failed and needs to be replaced immediately.
Discoloration
Discoloration of the capacitor casing can also indicate a problem. Look for any dark spots, rust, or unusual color changes. These signs often suggest overheating, which can lead to complete failure if not addressed.
Burn Marks
Burn marks are a serious sign of capacitor damage. If you see any charred areas or blackened spots, stop using the generator immediately. This level of damage can pose safety risks, including fire hazards.
Unusual Sounds
Listen for any unusual sounds coming from the generator. A buzzing or humming noise can indicate capacitor issues. Pay attention—if the sounds are persistent, it’s best to have a professional take a look.
Inconsistent Performance
If your generator is running inconsistently, it might be a sign of a failing capacitor. You may notice fluctuations in power output or difficulty starting. Evaluating these performance issues can help you pinpoint whether the capacitor is to blame. Recognizing these physical indicators can help you maintain your generator effectively. Have you experienced any of these signs? Taking action early can prevent bigger problems down the line.
Testing A Capacitor
Testing a capacitor is essential to ensure your generator operates smoothly. A faulty capacitor can lead to poor performance, making it crucial to identify any issues early on. Knowing how to test your capacitor will save you time and money in the long run.
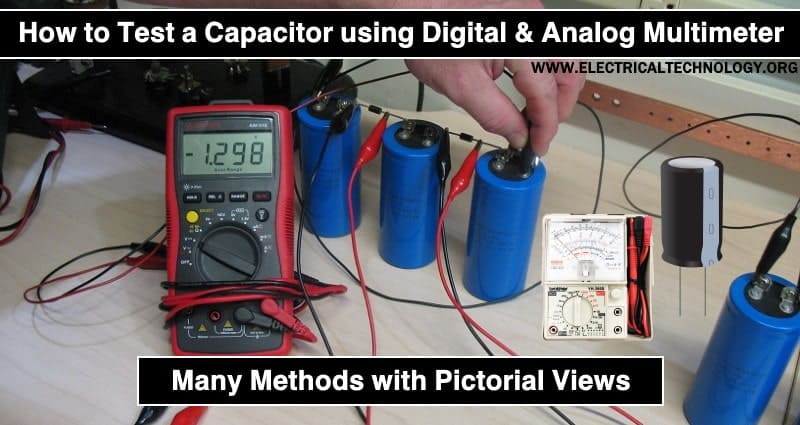
Using A Multimeter
A multimeter is a handy tool for testing the capacitor’s health. Start by ensuring the generator is powered off and unplugged. Safety first!
Set your multimeter to the capacitance setting. Connect the multimeter leads to the capacitor terminals. You should see a reading that matches the capacitor’s rated capacitance, usually printed on its body.
If the reading is significantly lower than the rated value, your capacitor might be faulty. A reading of zero suggests it may be completely dead.
Voltage And Resistance Checks
Beyond capacitance, checking voltage and resistance is crucial. Recharge the capacitor fully and then switch your multimeter to the voltage setting. Measure the voltage across the terminals.
If the voltage is lower than expected, the capacitor may not be holding a charge effectively. This can indicate a problem.
For resistance, switch the multimeter to the ohms setting. A healthy capacitor should show a rising resistance reading. If it stays low or goes to zero, the capacitor is likely shorted.
Understanding these tests can empower you to maintain your generator better. Have you ever found yourself struggling with a generator issue that turned out to be a simple capacitor problem? Knowing how to test your capacitor could save you from future headaches.
Common Causes Of Capacitor Failure
Capacitor failure in generators can happen for several reasons. Common issues include overheating, age, and electrical surges. Signs of a bad capacitor are unusual noises, failure to start, or flickering lights. Identifying these symptoms early can help prevent further damage to your generator.
Identifying the common causes of capacitor failure can save you time and money. Understanding these causes helps you take preventive measures and recognize the signs of a failing capacitor early. Here’s what you need to know.
Overheating
Overheating is one of the main culprits behind capacitor failure. High temperatures can break down the internal materials, leading to failure. Ensure your generator has proper ventilation to avoid overheating. Regularly check the operating temperature, especially in hot weather.
Electrical Surges
Electrical surges can damage your generator’s capacitor. These surges occur during storms or when heavy machinery starts up. Investing in surge protection can safeguard your capacitor and prolong its life. Have you checked your generator’s surge protection recently?
Age
The age of your capacitor plays a significant role in its reliability. Capacitors have a limited lifespan, often lasting around 10 to 15 years. As they age, their effectiveness diminishes, making them more prone to failure. Keep a close eye on older capacitors and consider replacing them preemptively.
Moisture Damage
Moisture can wreak havoc on electrical components, including capacitors. Water exposure can lead to short circuits and corrosion. Inspect your generator regularly for signs of moisture. Using a waterproof cover or keeping the generator in a dry place can help prevent moisture issues.
Poor Quality Components
Not all capacitors are created equal. Using low-quality or counterfeit components can lead to premature failure. Always choose reputable brands for replacements. Investing in quality components can save you from frequent repairs and replacements. Understanding these common causes can empower you to keep your generator running smoothly. Are you ready to take action and inspect your generator? Your proactive approach can make a significant difference.

Credit: www.youtube.com
Steps To Replace A Bad Capacitor
A bad generator capacitor can cause power issues. Signs include flickering lights, a humming noise, or the generator not starting. To replace it, first disconnect the power, remove the old capacitor, and install a new one. Always check the specifications to ensure a proper fit.
Replacing a bad capacitor in your generator can seem daunting, but it’s a manageable task with the right guidance. Knowing the steps will not only help you save money on repairs but also give you a sense of accomplishment. Let’s dive into the essential steps for replacing a bad capacitor and ensure your generator is up and running smoothly again.
Gather The Necessary Tools
Before starting, make sure you have everything ready. You will need: – A replacement capacitor – Screwdriver set – Multimeter – Safety goggles – Wire cutters/strippers Having these tools at hand will make the process smoother and safer.
Disconnect The Power
Your safety is paramount. Always disconnect the generator from any power source before starting repairs. – Unplug the generator from the outlet. – Remove the battery if applicable. Taking these steps prevents any accidental shocks while you work.
Locate The Capacitor
Now it’s time to find the capacitor. Open the generator’s cover to access the internal components. – Identify the capacitor, usually a cylindrical component with two or more wires attached. – Make a note of how the wires are connected. This will help you when you install the new capacitor.
Test The Capacitor
Before replacing it, confirm that the capacitor is indeed faulty. Use a multimeter to test its capacitance. – Set the multimeter to the capacitance setting. – Disconnect the capacitor wires. – Measure the capacitance and compare it to the specifications on the capacitor. If the reading is significantly lower, it’s time for a replacement.
Remove The Bad Capacitor
Carefully remove the faulty capacitor. – Unscrew or unclip it from its position. – Disconnect the wires, noting where each one was attached. This step requires a gentle touch to avoid damaging other components.
Install The New Capacitor
Now, it’s time to install the new capacitor. – Connect the wires to the new capacitor in the same configuration as the old one. – Secure it in place using screws or clips. Ensure everything is tight and secure to prevent any future issues.
Reconnect The Power And Test
Once everything is reassembled, reconnect the power source. – Start the generator and monitor its performance. – Listen for any unusual sounds and check for smooth operation. If it runs well, you’ve successfully replaced the capacitor! Taking these steps not only helps you understand your generator better but also empowers you to tackle similar issues in the future. What other maintenance tasks have you considered trying on your own?
Preventative Maintenance Tips
Taking care of your generator helps it run well. Regular checks can prevent big problems. Here are some easy tips to keep your generator capacitor in good shape.
Inspect Regularly
Look at your generator often. Check for signs of wear. Look for cracks or bulges in the capacitor. Notice any leaks or discoloration. Early detection can save you time and money.
Clean The Area
Keep the generator area clean. Dust and debris can cause issues. Remove any dirt around the generator. This helps with airflow and cooling. Clean components can work better.
Test Capacitor Voltage
Check the voltage of the capacitor. Use a multimeter for accuracy. This shows if the capacitor is working correctly. Low voltage readings can mean trouble.
Check Connections
Inspect all electrical connections. Loose or corroded connections can create problems. Tighten any loose wires. Clean off any corrosion. Strong connections help the generator run smoothly.
Schedule Professional Servicing
Get a professional to check your generator. They can spot issues you might miss. Regular servicing can extend the life of your generator. It ensures everything is in good shape.
Credit: www.electricaltechnology.org
Frequently Asked Questions
How Can I Tell If My Generator Capacitor Is Bad?
To determine if your generator capacitor is faulty, check for visible signs of damage like bulging or leaking. Additionally, test the capacitor with a multimeter to measure capacitance. A significant deviation from the rated capacitance value indicates a problem. Unusual noises or generator performance issues may also suggest a bad capacitor.
What Are The Symptoms Of A Bad Generator Capacitor?
Common symptoms of a bad generator capacitor include difficulty starting the generator, frequent shutdowns, or inconsistent power output. You may also notice flickering lights or a humming sound. If these symptoms occur, the capacitor might not be functioning properly. Addressing these issues promptly can prevent further damage to the generator.
Can A Generator Run Without A Capacitor?
While a generator can technically run without a capacitor, it may not operate efficiently. The capacitor helps stabilize voltage and improve performance. Without it, you may experience poor starting, unstable power output, and increased wear on the generator. It’s best to replace a faulty capacitor to ensure optimal operation.
How Do You Test A Generator Capacitor?
To test a generator capacitor, use a multimeter set to the capacitance mode. Disconnect the capacitor from the circuit for safety. Measure the capacitance and compare it to the rated value on the capacitor. If the reading is significantly lower or higher, the capacitor is likely defective and should be replaced.
Conclusion
A bad generator capacitor can cause many problems. Signs include poor performance and strange noises. Testing the capacitor can help identify issues. Replace it if it fails the test. Regular maintenance can prevent future problems. Keep an eye on your generator’s performance.
Catching issues early saves time and money. Understanding these signs helps you stay prepared. A well-functioning capacitor keeps your generator running smoothly. Stay proactive and ensure your generator works when you need it most.