
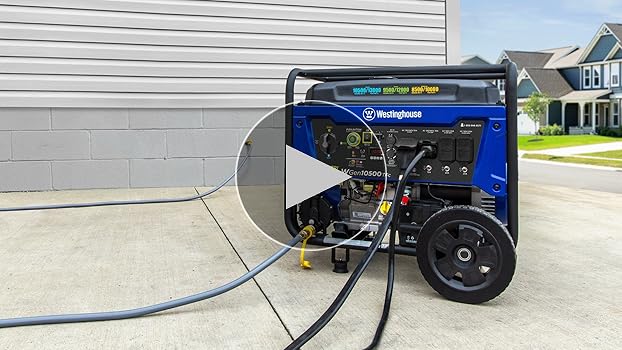
Connect the generator frame to a driven grounding rod using a heavy gauge copper wire and secure clamps.
I’ve worked with portable generators and grounded many units, including Westinghouse models. This guide explains exactly how to connect ground on Westinghouse 7500 generator with clear steps, safety notes, and testing tips. Read on to learn the right tools, the correct wiring path, and how to test your ground so your generator runs safely and code-compliant.

Safety first
Grounding a generator is about safety. A poor ground can cause shock hazards and equipment damage. Before you start, turn the generator off and remove the spark plug boot or disconnect battery power to prevent accidental starts.
Wear safety glasses and gloves. Work on dry, stable ground. If you are unsure about local electrical codes, consult a licensed electrician to confirm grounding requirements for your area and installation type.
Understanding generator grounding basics
Grounding links the metal frame of the generator to the earth to carry fault current away from people and equipment. The Westinghouse 7500 generator has a metal frame that should be bonded to an earth electrode when used as a separately derived system or when local codes require it.
Grounding does not replace safe transfer switching. If you connect the generator to home wiring, use a proper transfer switch and follow code rules to avoid backfeed. Grounding is about creating a low-resistance path for fault current and stabilizing voltages.
Tools and materials you will need
- 8 AWG or 6 AWG copper grounding wire (typically 6 AWG is recommended for portable generators)
- Grounding rod (8-foot copper or copper-clad rod is common)
- Ground clamp rated for the rod and wire
- Frame grounding clamp or self-tapping ground lug
- Wrenches and pliers
- Wire stripper and crimper
- Multimeter or clamp-on ground tester
- Hammer or ground rod driver (or sledge)
Choose materials that meet local code. I use 6 AWG copper wire for most portable generators because it gives low resistance and is easy to work with.

Step-by-step: how to connect ground on westinghouse 7500 generator
- Inspect the frame and find the grounding point
- Locate the factory grounding bolt or a clean, bare section of the frame. The Westinghouse 7500 often has a marked grounding point near the engine mount or control panel.
- Clean the connection area
- Remove paint, rust, or grease from the frame area using a wire brush. A clean metal surface ensures a solid electrical bond.
- Attach the frame grounding clamp or lug
- Secure the grounding clamp or lug to the cleaned frame point. Tighten the bolt firmly so the clamp cannot move. Use lock washers if needed.
- Run the grounding wire to the grounding rod
- Measure and cut enough 6 AWG copper wire to reach the grounding rod location without tension. Keep the wire tidy and away from hot surfaces and moving parts.
- Install the grounding rod
- Drive the 8-foot grounding rod vertically into the ground close to the generator. If the soil is rock or shallow, lay the rod at a 45-degree angle per local code or use multiple rods spaced apart.
- Clamp the wire to the grounding rod
- Attach the grounding wire to the rod with a corrosion-resistant ground clamp. Ensure the clamp contacts clean metal on the rod.
- Double-check all connections
- Confirm that both ends—frame and rod—are tight and clean. Use anti-oxidant grease on exposed copper connections if desired.
- Label and protect the wire
- Use conduit, trunking, or protective clips to shield the wire from damage. Label the connection in case anyone services the unit.
This step-by-step process explains how to connect ground on Westinghouse 7500 generator so that the frame has a clear path to earth. I’ve followed these steps for portable setups in my work and found they reduce stray voltage and simplify troubleshooting.

Testing and verifying the ground
- Use a multimeter to measure continuity between the generator frame and the grounding rod. Expect a near-zero resistance reading.
- For a more accurate test, use a ground resistance tester. Aim for a grounding resistance below 25 ohms; many installers prefer below 5 ohms for critical systems.
- Test under different soil conditions. Dry soil raises resistance; add moisture or a chemical ground enhancer if needed.
If tests show high resistance, try driving the rod deeper, adding a second rod spaced at least twice the rod length apart, or improving soil conductivity with water or conductive compound.
Common mistakes and troubleshooting
- Using undersized wire
- Use at least 8 AWG, but 6 AWG copper is safer for the Westinghouse 7500 generator to lower resistance.
- Connecting to rebar or random metal
- Always connect to a proper grounding rod or electrode per code, not random metal that may not have a solid earth connection.
- Loose or painted connections
- Paint, rust, or loose bolts increase resistance. Clean and tighten for good contact.
- Ignoring transfer switch rules
- If you bond neutral to ground on the generator and also on the main panel, you can create parallel neutral paths. Use a transfer switch and follow codes.
When troubleshooting, recheck clamps, remeasure resistance, and consider local soil conditions. I once had a high resistance reading because the clamp was painted under the bolt head—cleaning fixed it.

People also ask (PAA-style questions)
Can I ground my Westinghouse 7500 generator to a metal fence?
Connecting to a fence is not recommended unless the fence is a certified grounding electrode and meets code. Use an 8-foot grounding rod for reliable and code-compliant grounding.Do I need to ground a portable generator while camping?
Local rules vary, but grounding with a rod is recommended when you use the generator near people or connect sensitive equipment. For most portable use, bonding the frame and keeping the generator isolated is adequate if you do not tie into a structure.How often should I test the ground connection?
Test annually or after any heavy storm or relocation. Test sooner if you notice odd electrical behavior or after long periods of dry weather.
Frequently Asked Questions of how to connect ground on westinghouse 7500 generator
How thick should the grounding wire be for a Westinghouse 7500 generator?
Use 6 AWG copper wire when possible. It provides a low-resistance path and is commonly accepted for portable generator grounding.
Do I need a grounding rod if I only use extension cords?
A grounding rod is still recommended for safety when running significant loads or using the generator near people or structures. Extension cords alone do not provide a reliable earth path.
Can I ground the generator to the house ground?
Only if you use a properly installed transfer switch and follow local code. Directly tying the generator to house wiring without a transfer switch can create dangerous backfeed.
Is neutral bonding required on the Westinghouse 7500?
Neutral bonding depends on how you use the generator. If the generator is the only power source and supplies a structure’s wiring, neutral may need to be bonded at the generator. Check local codes and the generator manual.
What is an acceptable ground resistance value?
Many electricians aim for under 25 ohms for non-critical installations and under 5 ohms for critical systems. Local code and soil conditions can change that target.
Can I use multiple ground rods?
Yes. Using two rods spaced apart can lower resistance significantly. Follow code spacing rules—usually at least twice the rod length between rods.
What if the ground rod won’t go into the soil?
Try a new location with softer soil, use a ground rod driver, or lay the rod at a permitted angle. If none work, consult an electrician about alternative grounding electrodes.
Conclusion
Grounding your Westinghouse 7500 generator protects people and equipment. Follow the clear steps: choose the right wire, attach a solid frame connection, drive a proper grounding rod, and test the resistance. My practical experience shows that careful cleaning of connection points and using 6 AWG copper wire make the difference between a reliable ground and an unsafe setup.
Take action today: check your generator’s grounding point, gather the needed tools, and perform a test. If you’re unsure, book a licensed electrician to verify the work. Leave a comment or share your grounding experience below.