
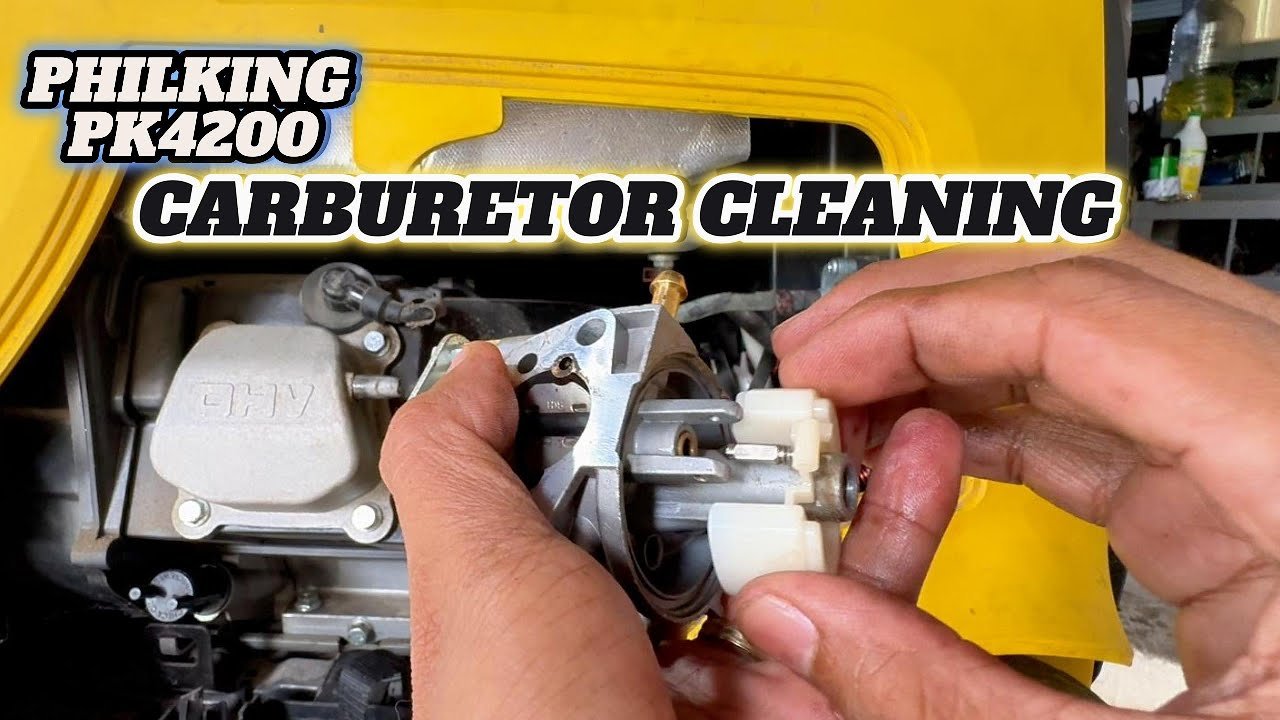
Is your generator struggling to start or running unevenly? The culprit is often a dirty carburetor.
Cleaning the carburetor in your generator may sound complicated, but it’s actually a simple task that can save you time and money. By taking just a little time to clean this vital part, you’ll keep your generator running smoothly when you need it most.
In this guide, you’ll learn clear, easy steps to clean your generator’s carburetor — whether you want a quick fix or a thorough deep clean. Stick with me, and you’ll have your generator back to full power before you know it!
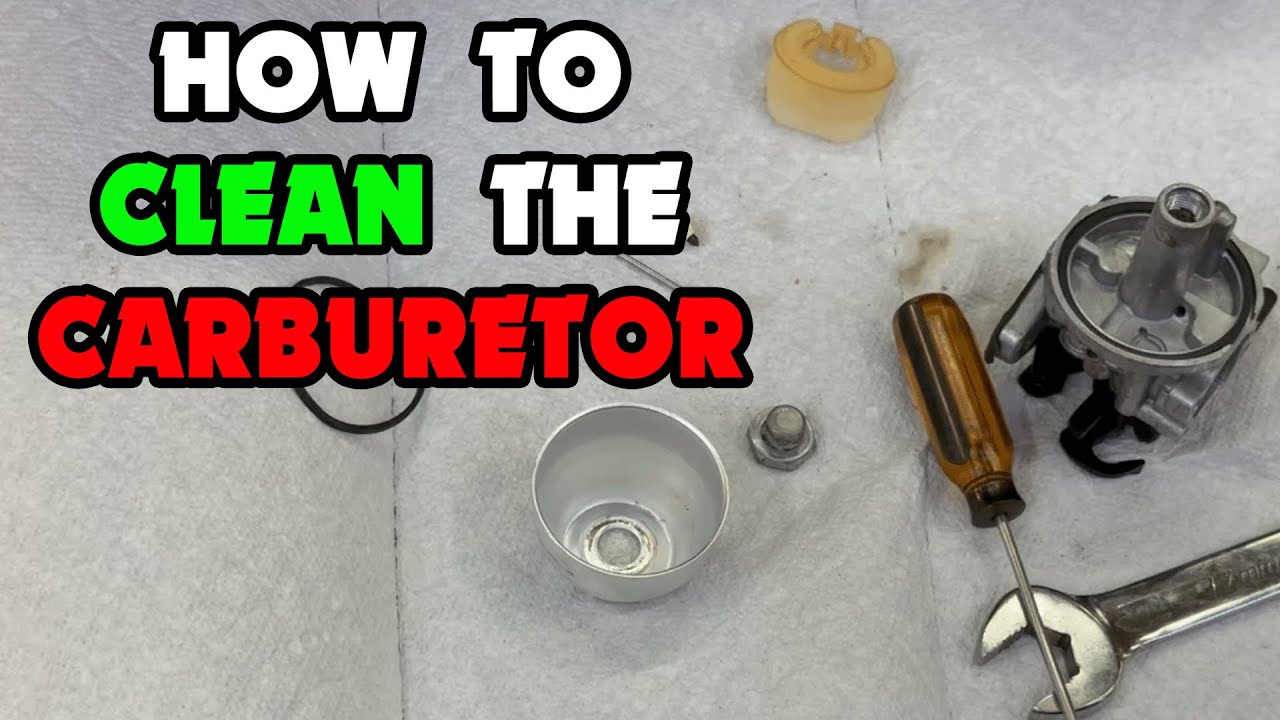
Credit: www.youtube.com
Signs Of Carburetor Issues
The carburetor is a key part of your generator’s engine. It mixes air and fuel for smooth running. Signs of carburetor issues show up in how the generator starts and runs. Spotting these signs early helps avoid bigger problems and costly repairs.
Watch for changes in how your generator behaves. These signs can signal that the carburetor needs cleaning or fixing. Knowing them helps keep your generator reliable and ready for use.
Difficulty Starting The Generator
Your generator may struggle or fail to start. The engine might crank but not catch. A clogged carburetor can block fuel flow. This makes starting slow or impossible.
Rough Or Uneven Engine Running
The engine runs rough or shakes while operating. You might hear sputtering or popping sounds. This means the fuel and air mix is wrong. Dirty carburetors often cause this problem.
Engine Stalls Or Dies Quickly
The generator stalls soon after starting. It may run for a few seconds then stop. Fuel delivery problems in the carburetor often cause stalling. Cleaning can restore steady running.
Low Engine Power Or Poor Performance
The generator does not produce full power. It may lag or lose speed under load. A dirty carburetor limits fuel supply. This reduces engine strength and output.
Excessive Fuel Consumption
You notice the generator uses more fuel than usual. A leaking or dirty carburetor wastes fuel. This causes higher running costs and frequent refills.
Tools And Materials Needed
Cleaning the carburetor in your generator requires specific tools and materials. Having the right items makes the process easier and more effective. Preparing everything before you start saves time and prevents frustration.
Below is a list of essential tools and materials needed for a thorough carburetor cleaning. Each item plays an important role in ensuring your generator runs smoothly again.
Basic Hand Tools
You will need screwdrivers, both flathead and Phillips, to remove carburetor parts. A set of small wrenches or sockets helps loosen bolts. Needle-nose pliers are useful for handling small clips and springs.
Carburetor Cleaner Spray
This spray dissolves dirt, varnish, and gum inside the carburetor. Choose a cleaner made specifically for carburetors. It evaporates quickly and leaves no residue.
Cleaning Brushes And Picks
Small wire brushes and plastic picks help clean tight spots and jets. Avoid metal tools that might damage delicate parts. Brushes with soft bristles remove grime without scratching.
Compressed Air Can Or Air Compressor
Blowing out debris with compressed air clears clogged jets and passages. Use short bursts of air for safety. This step ensures no blockages remain after cleaning.
Replacement Gaskets And Seals
Old gaskets often crack or deform after removal. Keep new gaskets ready to replace damaged ones. This prevents leaks and ensures a tight seal when reassembling.
Clean Cloths And Gloves
Use lint-free cloths to wipe parts and absorb excess cleaner. Wearing gloves protects your skin from chemicals and fuel. Safety first during the cleaning process.
Preparing Your Generator
Preparing your generator is the first step before cleaning the carburetor. It ensures safety and smooth work. Take your time to get everything ready.
Proper preparation helps avoid damage to the generator and injury to yourself. Follow these simple steps carefully.
Turn Off And Cool Down
Switch off the generator and unplug it from any power source. Allow the engine to cool for at least 30 minutes. This prevents burns and accidents.
Drain The Fuel Tank
Empty the fuel tank to avoid spills during cleaning. Use a container to catch the old fuel. This keeps your workspace clean and safe.
Gather Necessary Tools
Prepare all tools needed for carburetor cleaning. Common tools include screwdrivers, wrenches, and carburetor cleaner spray. Having tools ready speeds up the process.
Find A Clean Workspace
Choose a well-lit and ventilated area to work on your generator. A clean workspace helps keep parts organized and prevents dirt from entering the carburetor.

Credit: www.youtube.com
Minor Cleaning Without Removal
Minor cleaning without removal helps maintain your generator’s carburetor quickly. This method suits light dirt or small clogs. It improves performance without the hassle of taking the carburetor apart. Use this approach for regular upkeep or when time is short.
Gathering Necessary Supplies
Start with carburetor cleaner spray designed for generators. Have a clean cloth or small brush ready. Use safety gloves and goggles to protect yourself. Also, keep a screwdriver to open the air filter cover.
Accessing The Carburetor Area
Turn off the generator and disconnect the spark plug wire. Remove the air filter cover carefully. This exposes the carburetor throat without full removal. Be gentle to avoid damage to surrounding parts.
Applying Carburetor Cleaner Spray
Spray the cleaner into the carburetor throat. Aim for areas where dirt or fuel residue builds up. Avoid soaking the entire carburetor. Let the cleaner dissolve grime for a few minutes.
Cleaning External Surfaces
Use the cloth or brush to wipe dirt from the outside. Clean around the throttle linkage and choke areas. Removing grime here helps the carburetor work smoothly. Keep the parts dry after cleaning.
Put back the air filter and secure the cover. Reattach the spark plug wire. Start the generator and listen for smoother running. Minor cleaning may fix rough idling or hard starts.
Draining Fuel Safely
Draining fuel safely is the first step in cleaning your generator’s carburetor. Old or contaminated fuel can clog the carburetor and cause engine problems. Removing this fuel prevents spills and fire hazards. It also prepares your generator for a thorough cleaning.
Fuel is flammable and toxic. Handle it with care. Use proper tools and a safe place to drain the fuel. Follow these steps to protect yourself and your surroundings.
Choose A Well-ventilated Area
Perform fuel draining outdoors or in a space with good airflow. Avoid enclosed areas to reduce inhaling harmful fumes. Keep away from sparks, flames, and heat sources.
Gather Safety Equipment
Wear gloves and safety glasses to protect your skin and eyes. Use a container designed for fuel storage. Avoid using open buckets or plastic bags.
Turn Off The Generator And Cool It
Ensure the generator is off and cool before draining fuel. Hot engine parts can ignite fuel vapors. Wait at least 30 minutes after use.
Locate The Fuel Drain Valve Or Petcock
Find the fuel drain valve under the fuel tank or near the carburetor. Open the valve slowly to control fuel flow. Use a funnel to guide the fuel into your container.
Dispose Of Old Fuel Properly
Do not pour fuel down drains or on the ground. Take old fuel to a hazardous waste disposal center. Follow local regulations for fuel disposal.
Disconnecting Carburetor Components
Disconnecting carburetor components is the first step in cleaning your generator’s carburetor. This process requires care and attention. Proper disassembly helps avoid damage and makes cleaning easier.
Start by ensuring your generator is off and cooled down. Disconnecting parts carefully allows you to access internal areas that collect dirt and debris. Follow the steps below to remove each component safely.
Removing The Fuel Line
Locate the fuel line connected to the carburetor. Use pliers to gently pinch the clamp. Slide the clamp away and pull the fuel line off. Be ready with a cloth to catch any fuel spills. Avoid stretching or bending the line excessively.
Detaching The Throttle Linkage
Find the throttle linkage connected to the carburetor lever. Use a screwdriver or small wrench to loosen screws or bolts. Carefully lift the linkage off the lever. Keep track of small parts to avoid losing them. This step frees the carburetor for full removal.
Unscrewing The Carburetor Mounting Bolts
Identify the bolts holding the carburetor to the engine. Use the correct size wrench or socket to loosen them. Remove the bolts and place them in a safe container. Gently pull the carburetor away from the engine block. Avoid forcing it to prevent damage.
Removing The Carburetor
Removing the carburetor is a key step in cleaning your generator. This part mixes air and fuel for the engine. Dirt and debris can clog it, causing performance problems. Taking it out allows you to clean it deeply. Follow safety steps to avoid damage or injury. Work in a clean, well-lit area for best results.
Gather Necessary Tools
Prepare tools before starting. You will need screwdrivers, wrenches, and pliers. A small container helps keep screws safe. Wear gloves to protect your hands from fuel and dirt. Having everything ready speeds up the process.
Turn Off Fuel And Disconnect Battery
Stop fuel flow by closing the fuel valve. This prevents leaks and spills. Disconnect the battery cable to avoid electric shocks. Safety is important when working with fuel and electrical parts.
Locate The Carburetor On Your Generator
Find the carburetor near the engine. It usually connects to the air filter and fuel line. Check your generator’s manual if unsure. Clear the area around it to access screws and clamps easily.
Remove Air Filter And Housing
Unscrew or unclip the air filter cover. Take out the air filter carefully. This clears space to reach the carburetor. Keep parts in a safe place to avoid loss.
Disconnect Fuel Line And Linkages
Use pliers to remove clamps on the fuel line. Gently pull the fuel line off the carburetor. Detach throttle and choke linkages by loosening screws. Take care not to bend or break small parts.
Unscrew And Remove The Carburetor
Loosen mounting screws or bolts holding the carburetor. Support the carburetor with your hand while removing fasteners. Pull the carburetor away from the engine carefully. Keep track of all screws for reassembly.
Disassembling The Carburetor
Disassembling the carburetor is the first key step to clean it properly. It allows you to reach all parts inside. Dirt and deposits often hide deep within the carburetor. Taking it apart helps to remove these blockages effectively.
Handle each piece carefully to avoid damage. Keep parts organized to make reassembly easier. Use simple tools like screwdrivers and pliers. Work in a clean, well-lit space to avoid losing small components.
Preparing Your Workspace And Tools
Clear a flat surface to work on. Gather tools such as screwdrivers, wrenches, and a small container for screws. Lay down a clean cloth to catch falling parts. Good lighting helps you see small details clearly.
Removing The Carburetor From The Generator
Turn off the generator and disconnect the spark plug wire. Shut off the fuel valve to stop fuel flow. Unscrew the bolts holding the carburetor to the engine. Gently pull the carburetor away, avoiding damage to hoses and cables.
Taking Apart The Carburetor Components
Start by removing the float bowl at the bottom. Use a screwdriver to unscrew the bowl carefully. Take out the float, needle valve, and jets. Note their positions for correct reassembly later.
Cleaning Jets And Passages
Cleaning the jets and passages in your generator’s carburetor is crucial for smooth engine performance. These tiny parts control fuel flow and air mixture. Dirt or debris can block them, causing the generator to run poorly or not start at all.
Regular cleaning prevents buildup and keeps fuel flowing freely. It ensures the engine runs efficiently and lasts longer. Let’s look at the steps to clean these important parts carefully.
Locating Jets And Passages
Start by removing the carburetor from the generator. Identify the jets, which are small brass nozzles inside the carburetor. The passages are narrow channels that connect different parts inside the carburetor. Use a manual or diagram if needed.
Using The Right Cleaning Tools
Use a carburetor cleaner spray designed to dissolve varnish and dirt. Thin wire or a soft brush helps clear stubborn blockages. Avoid using large or sharp tools that could damage the jets or passages.
Cleaning The Jets
Spray cleaner into each jet and let it soak for a few minutes. Insert a fine wire gently to remove any clogs. Blow compressed air through the jets to clear leftover debris. Repeat if necessary until the jets are clear.
Cleaning The Passages
Spray cleaner into every passage inside the carburetor. Use compressed air to blow out any loosened dirt. Make sure all channels are open and free of blockages. This step is vital for proper fuel and air flow.
Reassembling The Carburetor
Once cleaned, carefully reassemble the carburetor. Check that all parts fit tightly and correctly. Reinstall it on the generator, ensuring all connections are secure. Test the generator to confirm smooth operation.
Reassembling And Testing
Reassembling and testing the carburetor is the final step. Take time to ensure each part fits perfectly. A careful rebuild prevents leaks and engine problems. Testing confirms the carburetor works well and the generator runs smoothly.
Careful Reassembly Of Carburetor Parts
Start by placing the float and needle valve back in position. Use clean tools to avoid dirt contamination. Tighten screws evenly to prevent warping. Make sure gaskets sit flat to stop fuel leaks. Check each small part for wear or damage. Replace any worn pieces before final assembly.
Installing The Carburetor On The Generator
Attach the carburetor to the engine carefully. Align mounting holes and tighten bolts securely. Reconnect the fuel lines without twisting or kinking them. Connect the throttle linkage and choke lever properly. Double-check all connections for firmness. A loose connection can cause poor engine performance.
Starting And Testing The Generator
Fill the fuel tank with fresh gasoline. Turn the choke to the start position. Pull the starter cord smoothly and steadily. Listen for smooth engine running without sputters. Let the engine warm up for a few minutes. Adjust the idle speed if needed for steady running. Watch for any fuel leaks or strange noises. Stop the engine and fix issues before use.

Credit: www.youtube.com
Frequently Asked Questions
Can You Clean A Generator Carburetor Without Removing It?
You can spray carburetor cleaner into the carburetor throat for minor cleaning without removal. For thorough cleaning, remove and disassemble the carburetor.
What Are The Symptoms Of A Dirty Carburetor On A Generator?
A dirty carburetor causes hard starting, rough running, stalling, poor acceleration, and reduced power in a generator.
How To Clean Out The Carburetor On A Generator?
Turn off the generator and drain fuel. Remove the carburetor carefully. Disassemble and soak parts in carburetor cleaner. Use compressed air to clear passages. Reassemble and reinstall, then test the generator.
Can I Spray Wd-40 In My Carburetor?
Do not spray WD-40 in your carburetor. Use a proper carburetor cleaner for safe and effective cleaning.
How Often Should I Clean The Carburetor In My Generator?
Clean the carburetor every 6 months or after 50 hours of use to keep it running well.
What Tools Do I Need To Clean A Generator Carburetor?
You need screwdrivers, carburetor cleaner, compressed air, a small brush, and safety gloves.
Can I Clean The Carburetor Without Removing It?
Minor cleaning is possible with spray, but full cleaning requires removal and disassembly.
What Are Signs Of A Dirty Generator Carburetor?
Look for hard starts, rough running, low power, or stalling during use.
How Do I Safely Remove The Carburetor From My Generator?
Turn off fuel, disconnect battery, unscrew mounting bolts, and carefully detach fuel lines.
What Cleaning Products Work Best For Carburetor Cleaning?
Use carburetor cleaner spray made for small engines to dissolve deposits and grime.
Conclusion
Cleaning the carburetor keeps your generator running smoothly. Regular maintenance prevents fuel buildup and engine problems. Take time to remove and clean all parts carefully. Use simple tools and follow safety steps. A clean carburetor improves fuel flow and performance.
This small task saves you from costly repairs later. Keep your generator ready for use anytime. Clean it well, run it well, stay prepared.