

If your generator isn’t starting properly, the issue might be with the recoil spring. This small component plays a crucial role in the starting mechanism, and when it fails, it can lead to frustration and wasted time.
But don’t worry—you can fix it yourself! In this guide, you will learn how to diagnose the problem, replace the recoil spring, and get your generator running smoothly again. You’ll save money on repairs and gain confidence in your DIY skills.
Stick around, and let’s get your generator back in action!
Common Issues With Recoil Springs
Understanding the common issues with recoil springs is crucial for maintaining your generator’s performance. These springs are essential for starting the engine, and when they fail, it can lead to frustrating situations. You may find yourself stranded with a generator that won’t start, leaving you wondering what went wrong.
Worn-out Springs
One of the most frequent issues is worn-out recoil springs. Over time, these springs can lose their tension due to repeated use. If you notice that your generator’s pull cord feels loose or doesn’t retract properly, the spring might be the culprit.
Corrosion And Rust
Corrosion can also be a significant problem. If your generator is exposed to moisture, the recoil spring can develop rust. This not only affects its functionality but can also lead to breakage. Regularly inspect the spring for any signs of corrosion.
Improper Installation
Another common issue arises from improper installation. If the recoil spring is not installed correctly, it can lead to malfunction. Make sure to follow the manufacturer’s instructions closely during the installation process to avoid this problem.
Debris And Dirt Buildup
Debris and dirt can accumulate around the recoil spring, causing it to stick or jam. This buildup may prevent the spring from functioning properly. Regular cleaning can help keep your generator in top shape and prevent these issues.
Broken Springs
Lastly, springs can break due to fatigue or excessive tension. If you hear a snap when pulling the cord, it’s likely the spring has broken. Replacing a broken recoil spring is essential to restore your generator’s performance.
Have you experienced any of these issues with your generator? Addressing them promptly can save you time and money in the long run. Regular maintenance checks will help you catch these problems before they escalate.
Tools Needed For The Repair
To fix a generator recoil spring, gather essential tools first. You will need a socket set, pliers, and a flathead screwdriver. These tools help you disassemble and reassemble the generator safely.
Repairing a generator recoil spring may seem daunting, but having the right tools can make the process straightforward and efficient. Below, you’ll find a list of essential tools that will help you tackle this repair with confidence.Basic Hand Tools
You’ll need some basic hand tools to get started. Here’s what you should gather:- Screwdrivers:Both flathead and Phillips head screwdrivers are essential for removing any screws.
- Wrenches:A set of wrenches will help you loosen and tighten nuts and bolts.
- Pliers:Needle-nose pliers are particularly useful for gripping small parts.
Specialized Tools
Some specialized tools can make your job easier. Consider adding these to your toolkit:- Spring Puller:This tool helps you easily remove and install the recoil spring without risking damage.
- Torque Wrench:Ensures that bolts are tightened to the manufacturer’s specifications.
- Magnetic Tray:Keeps small parts organized and prevents loss during the repair.
Safety Gear
Safety should always be a priority. Equip yourself with:- Safety Glasses:Protect your eyes from debris while working.
- Gloves:Wear gloves to shield your hands from sharp edges and chemicals.
- Dust Mask:If you’re working in a dusty area, a mask can help protect your lungs.
Cleaning Supplies
Before you dive into the repair, make sure you have cleaning supplies ready. A clean workspace can enhance your efficiency. Gather:- Rags:Useful for wiping down parts and your workspace.
- Degreaser:Helps remove grease and grime from components.
- Cleaning Brush:A stiff brush can get into small crevices effectively.
Safety Precautions Before Starting
Fixing a generator recoil spring can be dangerous. Safety must be your first priority. Take time to prepare before starting any repairs. Here are some key safety precautions.
Wear Protective Gear
Always wear safety goggles. This protects your eyes from debris. Use gloves to protect your hands. Sturdy footwear prevents slips and falls.
Work In A Well-ventilated Area
Choose a space with good airflow. This helps reduce harmful fumes. Avoid working in enclosed spaces. Fresh air keeps you safe.
Disconnect The Power Source
Before starting, disconnect the generator. This prevents accidental starts. Make sure no power is running. Safety is key when working on machines.
Keep Tools Organized
Use a clean workspace. Keep tools in order. This helps avoid accidents. Always put tools back in their place after use.
Read The Manual
Check the generator’s manual before starting. It contains important safety information. Understand the parts you will work on. Follow all manufacturer instructions carefully.
Have First Aid Ready
Keep a first aid kit nearby. Accidents can happen, even with precautions. Be prepared for minor injuries. Quick access to supplies can help.
Removing The Recoil Spring Housing
Removing the recoil spring housing is an important step in fixing your generator’s recoil spring. This process allows for easier access to the spring, ensuring proper repairs. Follow the steps carefully to avoid complications and restore your generator to good working order.
Removing the recoil spring housing is a vital step in fixing your generator. This process can seem daunting, but with the right tools and a clear approach, you can tackle it effectively. Understanding how to safely remove the recoil spring housing will not only help you fix your generator but also enhance your overall maintenance skills.Gather Your Tools
Before you start, make sure you have the necessary tools on hand. Here’s what you’ll need:- Wrench set
- Screwdriver (flathead and Phillips)
- Pliers
- Safety glasses
- Gloves
Disconnect The Generator
Before removing the recoil spring housing, disconnect your generator from any power source. This step is crucial to avoid electric shocks. Ensure that the generator is turned off and completely cool. Double-check that the fuel line is also disconnected.Remove The Screws And Bolts
Locate the screws or bolts holding the recoil spring housing in place. Use your screwdriver or wrench to remove them carefully. Keep track of the screws in a small container to avoid losing them. If you encounter resistance, don’t force it. Applying too much pressure may damage the housing.Detach The Recoil Spring Housing
Once the screws are removed, gently pull the recoil spring housing away from the generator. Be cautious; it may take a little wiggling to get it free. If it feels stuck, check for any remaining screws or clips that might still be attached. Taking your time here prevents unnecessary damage to the housing.Inspect For Damage
After you have successfully removed the recoil spring housing, take a moment to inspect it. Look for any signs of wear or damage that may need addressing. This can save you time later on and ensure your generator runs smoothly. Have you ever overlooked a small issue that turned into a bigger problem? Taking a few extra minutes for inspection can help you avoid future headaches. Removing the recoil spring housing may seem like a small task, but it’s a significant step in your generator maintenance journey. With the right preparation and care, you’ll be on your way to fixing that recoil spring in no time!Inspecting The Damaged Spring
Inspecting the damaged spring of your generator is crucial for a smooth repair process. A faulty recoil spring can hinder the generator from starting efficiently. Let’s break down how to inspect it properly, ensuring you can address any issues effectively.
Identifying Signs Of Damage
Begin by examining the recoil spring for visible signs of wear or damage. Look for:
- Fraying or breaks in the coil
- Rust or corrosion that indicates aging
- A loss of tension, making it feel loose
Each of these signs can signal that your spring needs replacing. Have you noticed any unusual sounds when starting your generator?
Removing The Recoil Assembly
To inspect the spring closely, you must first remove the recoil assembly. This involves:
- Disconnecting any fasteners securing the cover.
- Gently pulling off the recoil assembly from the engine.
- Ensuring you keep track of all parts removed for easier reassembly.
Handling this process carefully will prevent any additional damage. Have you ever faced a challenge while reassembling? It’s often the small parts that get lost!
Checking For Proper Functionality
Once you have access to the spring, check its functionality by manually pulling the recoil. It should retract smoothly without sticking. If it feels rough or doesn’t retract at all, it’s time for a replacement.
Have you tried pulling the recoil multiple times? Sometimes, the first pull can give a false impression of functionality.
Documenting Your Findings
Make a note of any issues you discover during your inspection. Keeping a record helps you track recurring problems and makes future repairs easier. Consider using a simple checklist to document your observations.
Which problems stood out the most during your inspection? Identifying patterns can save you time and money in the long run.
Cleaning And Preparing Components
Cleaning and preparing components is crucial for fixing a generator recoil spring. A clean workspace and well-maintained parts can make the difference between a successful repair and a frustrating experience. Let’s dive into how you can effectively clean and prepare your components to ensure your generator runs smoothly.
Gather Your Cleaning Supplies
Before you start, make sure you have the right tools and supplies. Here’s a quick checklist:
- Soft cloths or rags
- Degreaser or cleaning solution
- Brushes (small and medium-sized)
- Compressed air canister
- Lubricant
Having these items ready will streamline the cleaning process. A well-organized approach helps you stay focused and efficient.
Remove Dirt And Debris
Start by inspecting the recoil spring and its surrounding components. Use a soft cloth or rag to wipe away any dirt or grime. For stubborn spots, apply a degreaser.
Brushes can reach tight areas that cloths can’t. This attention to detail prevents buildup that could hinder performance.
Inspect For Damage
After cleaning, take a close look at each component. Are there any cracks or signs of wear? Check the recoil spring for bends or breaks that might affect its function.
This step is vital. Sometimes, a simple cleaning reveals issues you might overlook otherwise. Wouldn’t you rather catch them now than later?
Dry And Lubricate Components
Once everything is clean, ensure all parts are completely dry. Moisture can lead to rust, which can damage your generator.
Apply a light coat of lubricant to the recoil spring. This will help it operate smoothly and extend its lifespan. Remember, a little goes a long way!
Reassemble With Care
When putting everything back together, make sure each component is properly aligned. A misaligned spring can lead to further problems.
Take your time during reassembly. Double-check your work and ensure everything is secure. Would you want to face the hassle of disassembling it again?
By following these cleaning and preparation steps, you set your generator up for success. A little effort now leads to better performance later.
Reattaching Or Replacing The Spring
Fixing a generator recoil spring can seem daunting, but reattaching or replacing it doesn’t have to be a complicated task. Whether your generator is refusing to start or the recoil mechanism feels sluggish, addressing the spring issue is crucial for optimal performance. Here’s a straightforward guide to help you through this process.
Understanding The Recoil Spring
The recoil spring is a vital component that aids in the starting mechanism of your generator. If it’s damaged or detached, you may notice that the pull cord doesn’t return smoothly. This can be frustrating, especially during an emergency power outage.
Assess The Damage
Before you dive into reattaching or replacing the spring, take a moment to inspect it. Look for signs of wear, such as:
- Bends or kinks in the spring
- Rust or corrosion
- Broken ends
If you notice any of these issues, it’s likely time to replace the spring. If it’s simply detached, reattaching it may be all you need.
Gather Your Tools
To get started, ensure you have the right tools on hand. You’ll typically need:
- Screwdrivers (flathead and Phillips)
- Pliers
- Replacement spring (if needed)
- Safety gloves
Having the right tools will make the job smoother and safer.
Reattaching The Spring
If the spring is merely detached, follow these steps:
- Remove the recoil housing by unscrewing the screws.
- Locate where the spring attaches to the recoil mechanism.
- Carefully reattach the spring, ensuring it’s seated properly.
- Test the pull cord to see if it returns smoothly.
Taking your time here will save you headaches later. If it feels stiff, double-check your connections.
Replacing The Spring
Should you need to replace the spring, the process is quite similar:
- Remove the recoil housing as mentioned earlier.
- Take out the old spring and dispose of it properly.
- Insert the new spring, ensuring it’s oriented correctly.
- Reassemble the housing and test the recoil mechanism.
A new spring can significantly improve the starting mechanism. You might find that your generator starts with much less effort!
Final Checks And Testing
After reattaching or replacing the spring, it’s essential to test your generator. Start it up and observe how the recoil feels. Is it smooth? Does the pull cord retract fully?
Taking these steps not only ensures your generator is in good working order but also gives you peace of mind. The next time you need it, you’ll be ready.

Credit: www.youtube.com
Testing The Generator Functionality
Testing the generator’s functionality is essential for safe operation. Fixing the recoil spring can solve many issues. Proper adjustment ensures the generator runs smoothly and efficiently.
Testing the generator’s functionality is a crucial step in ensuring that your equipment runs smoothly. A malfunctioning recoil spring can lead to operational failures, making it essential to check if everything is working correctly after repairs. Let’s dive into effective methods to test your generator and confirm it’s in top shape.Visual Inspection
Start with a thorough visual inspection. – Check the recoil spring for any visible wear or damage. – Look for loose connections or signs of rust on components. – Ensure that the generator is clean and free of debris. This simple step can reveal problems that might not be immediately obvious.Testing The Start Mechanism
Next, test the starting mechanism. 1. Pull the recoil starter handle slowly. 2. Observe if the spring retracts smoothly. 3. Listen for any unusual sounds during the operation. If you notice resistance or odd noises, the recoil spring may need adjustment or replacement.Running The Generator
After confirming the start mechanism works, run the generator. – Monitor the power output using a multimeter. – Check if the generator maintains a steady voltage. – Listen for any irregular sounds while it’s running. Experiencing fluctuations in power or loud noises could indicate deeper issues with the recoil spring or other components.Load Testing
Conduct a load test to ensure your generator can handle its intended workload. – Connect a load to the generator, such as lights or appliances. – Observe how it performs under stress. – Ensure it starts and operates without stalling or surging. This test simulates real-world conditions. It’s vital for confirming your generator is ready for use when you need it most. Testing your generator’s functionality is not just about finding faults but ensuring reliability. Have you checked your generator lately? Regular maintenance and testing can save you from unexpected outages.Maintenance Tips For Long-term Use
Maintaining your generator is essential for ensuring it runs smoothly over the years. A well-maintained generator can save you time, money, and headaches in the long run. Let’s look at some practical maintenance tips that will help extend the life of your recoil spring and overall generator performance.
Regular Inspections
Make it a habit to inspect your generator regularly. Check the recoil spring for any signs of wear or damage.
- Look for frays or breaks in the spring.
- Ensure the spring is properly aligned and not obstructed.
Early detection can prevent bigger issues later on. Your generator deserves a little TLC to keep it in top shape.
Cleaning The Components
Keeping your generator clean is vital. Dust and debris can accumulate and affect performance.
- Use compressed air to blow out dust from hard-to-reach areas.
- Wipe down surfaces with a damp cloth to remove dirt.
A clean generator not only looks good but also runs efficiently. Think about how often you clean your other tools—your generator needs the same attention.
Lubrication
Proper lubrication is crucial for the recoil spring. It reduces friction and wear.
- Apply a light machine oil to the recoil spring periodically.
- Check the manufacturer’s guidelines for recommended lubrication intervals.
Over-lubricating can attract dirt, so use just enough to keep things running smoothly. Have you ever felt the difference between a well-oiled machine and a squeaky one?
Storage Practices
How you store your generator matters. Keep it in a dry, cool place to prevent rust and corrosion.
- Consider using a cover to protect it from dust and moisture.
- Remove fuel if you plan to store it for an extended period.
Taking these steps will ensure your generator is ready to perform when you need it most. Have you experienced difficulties with a generator that was improperly stored?
Replacement Parts
Sometimes, replacement is the best option. Know when to replace your recoil spring. If it shows significant wear, don’t hesitate.
- Use manufacturer-approved parts for replacements.
- Keep spare parts on hand for quick fixes.
Being proactive about replacements can save you from unexpected breakdowns. How often do you check for parts that might need replacing?
Implementing these maintenance tips will not only enhance the life of your generator but also ensure it’s always ready for action. A little effort goes a long way, and your generator will thank you for it!
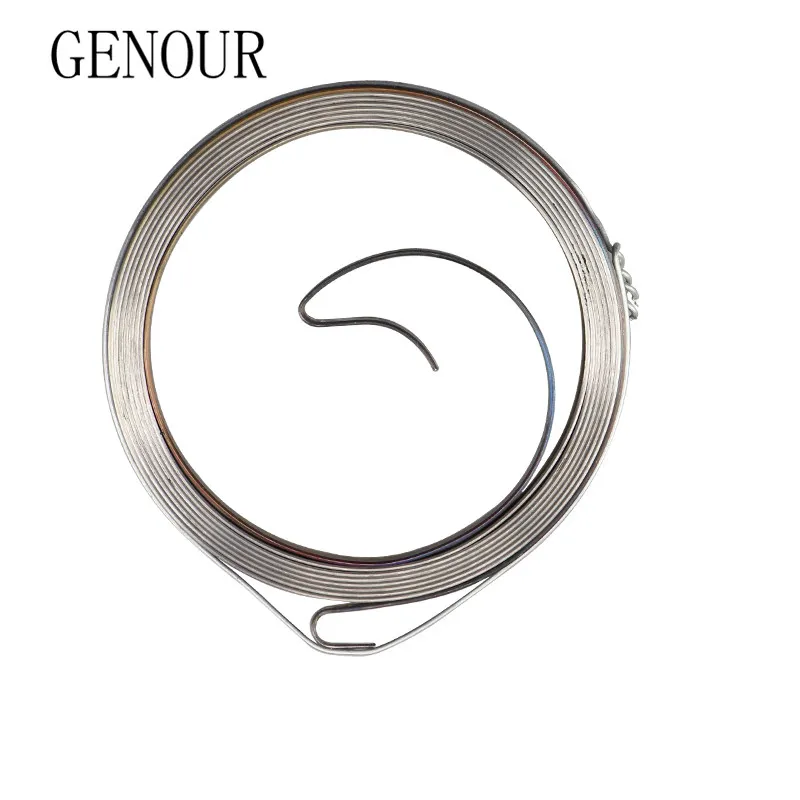
Credit: www.dhgate.com

Credit: www.reddit.com
Frequently Asked Questions
How Do I Identify A Faulty Recoil Spring?
To identify a faulty recoil spring, listen for unusual noises during operation. Check for any visible damage or deformation. If the generator fails to start or operate smoothly, the recoil spring may be the issue. Regular inspections can help prevent these problems.
What Tools Do I Need To Fix A Recoil Spring?
To fix a recoil spring, you will need basic tools like a screwdriver and pliers. A socket set may also be useful for removing the generator cover. Additionally, having a replacement recoil spring on hand is essential for a successful repair.
Can I Replace The Recoil Spring Myself?
Yes, you can replace the recoil spring yourself with proper guidance. Follow the manufacturer’s instructions and safety precautions. Ensure you have the right tools and a replacement part ready. If you’re unsure, consult a professional or watch tutorial videos for assistance.
What Are The Symptoms Of A Damaged Recoil Spring?
Symptoms of a damaged recoil spring include difficulty starting the generator and unusual noise during operation. You may also notice the pull cord does not retract properly. If these signs occur, inspect the recoil spring to determine if it needs repair or replacement.
Conclusion
Fixing a generator recoil spring is doable. Follow the steps carefully. Check your tools and parts before starting. Take your time to avoid mistakes. Regular maintenance prevents future issues. A working recoil spring helps your generator run smoothly. If problems persist, consult a professional.
This ensures safety and proper function. With practice, you can handle this repair easily. Keep your generator in good shape for reliable power. Remember, a little care goes a long way. Your generator deserves it.